Open post

noco genius 5×2 manual

NOCO Genius 5×2 Manual: Comprehensive Guide

This manual provides a detailed overview of the NOCO Genius 5×2, a versatile 10-amp, two-bank smart charger, designed for various battery types.
It covers installation, operation, troubleshooting, and maintenance, ensuring optimal battery performance and longevity for marine and automotive applications.

The NOCO Genius 5×2 is a sophisticated, fully automatic smart charger meticulously engineered to rejuvenate and maintain both 12-volt lead-acid, AGM, and lithium batteries. This onboard, two-bank charger delivers a total of 10 amps – 5 amps per bank – making it ideal for boats, jet skis, pontoons, and various automotive applications.

Unlike traditional chargers, the Genius 5×2 requires no manual intervention or specialized knowledge. Its intuitive design automatically detects battery type and condition, initiating the appropriate charging cycle. It can even diagnose and attempt to repair damaged batteries, extending their lifespan. The charger actively monitors battery health, providing long-term maintenance and ensuring peak performance. It’s a complete solution from initial charge to sustained upkeep.

What is the NOCO Genius 5×2?

The NOCO Genius 5×2 is a 12-volt, 10-amp (5-amp per bank) onboard battery charger designed for marine and automotive use. It’s a multi-bank charger, meaning it can independently charge two batteries simultaneously, offering selectable charging modes for lead-acid, AGM, and lithium battery chemistries. This eliminates the need for multiple chargers and simplifies battery maintenance.

This smart charger isn’t just about delivering power; it’s about intelligent battery management. It features a fully automatic operation, meaning it assesses battery condition and adjusts the charging process accordingly. The integrated repair mode attempts to restore sulfated or deeply discharged batteries, potentially saving you the cost of replacements. It’s a robust, user-friendly solution for maintaining optimal battery health and extending battery life.

Key Features and Benefits

The NOCO Genius 5×2 boasts several key features that deliver significant benefits to users. Its two-bank design allows for simultaneous charging of separate battery systems, ideal for boats with dedicated starting and house batteries. The fully automatic operation simplifies usage – simply connect and let the charger handle the rest, detecting battery type and condition.

Furthermore, the inclusion of a 12V Repair Mode offers a chance to revitalize sulfated batteries, potentially avoiding costly replacements. Its compatibility with lead-acid, AGM, and lithium batteries provides versatility. The charger’s intelligent design ensures safe and efficient charging, actively monitoring and maintaining batteries for extended lifespan. It’s a complete solution for battery maintenance, offering peace of mind and prolonged battery performance.

Technical Specifications

The NOCO Genius 5×2 is a 12V, 10-amp (5A per bank) charger, supporting lead-acid, AGM, and lithium batteries, offering versatile and efficient charging capabilities.

Voltage Compatibility (12V)

The NOCO Genius 5×2 is specifically designed for 12-volt battery systems, making it ideal for a wide range of vehicles and marine applications. This charger is not compatible with 6-volt or 24-volt batteries, and attempting to use it with these systems could result in damage to both the charger and the battery.

Its 12V compatibility extends to various battery types, including standard lead-acid, absorbent glass mat (AGM), and lithium-ion batteries. The charger automatically detects the battery voltage and adjusts the charging process accordingly, ensuring safe and efficient charging. Maintaining the correct voltage is crucial for optimal battery health and performance, and the Genius 5×2 is engineered to deliver consistent and reliable 12V charging.

Charging Current (10A Total, 5A Per Bank)

The NOCO Genius 5×2 delivers a total charging current of 10 amps, intelligently distributed across its two independent banks. Each bank provides a maximum of 5 amps, allowing for simultaneous charging of two 12-volt batteries. This feature is particularly useful for boats or vehicles equipped with dual battery systems.

The independent bank design ensures that each battery receives the optimal charging current based on its individual needs. The charger dynamically adjusts the current to prevent overcharging and maximize battery life. This smart charging capability makes the Genius 5×2 a safe and efficient solution for maintaining multiple batteries, prolonging their lifespan and ensuring reliable performance.

Battery Types Supported

The NOCO Genius 5×2 is a versatile charger, compatible with a wide range of 12-volt battery types, offering a comprehensive charging solution for various applications. It expertly supports traditional Lead-Acid batteries, commonly found in older vehicles and some marine setups. Furthermore, it’s fully compatible with AGM (Absorbent Glass Mat) batteries, known for their spill-proof design and enhanced performance.

Importantly, the Genius 5×2 also caters to modern Lithium batteries, increasingly popular for their lightweight nature and high energy density. Selectable charging modes ensure each battery type receives the correct voltage and current for optimal charging and maintenance. This broad compatibility eliminates the need for multiple chargers, simplifying battery management and providing a truly universal solution.

Lead-Acid Batteries

When charging Lead-Acid batteries with the NOCO Genius 5×2, selecting the appropriate 12V charging mode is crucial. These batteries, commonly used in older vehicles and some marine applications, require a specific charging profile to maximize lifespan and performance. The Genius 5×2 delivers a controlled and efficient charge, preventing overcharging and sulfation – a common issue that reduces battery capacity.

The charger automatically detects the battery’s state of charge and adjusts the charging process accordingly. It’s important to ensure the battery is in good condition before initiating the charge; the Genius 5×2 can even attempt to repair some damaged Lead-Acid batteries using its dedicated Repair Mode. Regular maintenance with the Genius 5×2 will help prolong the life of your Lead-Acid batteries.

AGM Batteries

The NOCO Genius 5×2 excels at charging Absorbed Glass Mat (AGM) batteries, a popular choice for marine and RV applications. AGM batteries require a slightly different charging profile than traditional Lead-Acid batteries, and the Genius 5×2’s dedicated 12V AGM charging mode provides precisely that. This mode optimizes the charging process for AGM batteries, ensuring they receive a full and efficient charge without damage.

AGM batteries are known for their durability and low maintenance, and the Genius 5×2 helps maintain these benefits. The charger’s smart technology prevents overcharging, which can shorten the lifespan of AGM batteries. Utilizing the 12V AGM mode regularly will contribute to maximizing the performance and longevity of your AGM battery investment, offering reliable power when you need it most.

Lithium Batteries

The NOCO Genius 5×2 is equipped to safely and effectively charge Lithium (LiFePO4) batteries, increasingly popular for their lightweight design and high energy density. Selecting the dedicated 12V Lithium charging mode is crucial when working with these batteries, as they require a specific charging algorithm different from Lead-Acid or AGM types. This mode prevents damage and optimizes the charging process for Lithium chemistries.

The Genius 5×2’s smart technology monitors the Lithium battery’s voltage and current, ensuring a controlled and complete charge. Overcharging Lithium batteries can be dangerous, but the Genius 5×2’s automatic operation eliminates this risk; Consistent use of the 12V Lithium mode will help extend the lifespan and maintain the optimal performance of your Lithium batteries, providing reliable power for your applications.

Installation and Setup

Proper installation is key for optimal performance. This section details mounting procedures, secure battery connections, and the initial power-up sequence with a self-test function.

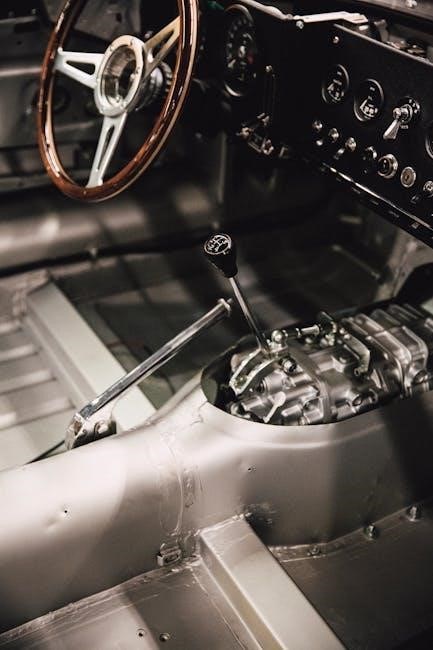
Mounting the NOCO Genius 5×2

Selecting a suitable mounting location is crucial for the longevity and performance of your NOCO Genius 5×2. The charger should be installed in a dry, well-ventilated area, protected from extreme temperatures and direct exposure to water or harsh chemicals. Ensure the mounting surface is solid and capable of supporting the charger’s weight.

It’s recommended to mount the unit vertically to facilitate heat dissipation. Use corrosion-resistant hardware, such as stainless steel screws, to secure the charger firmly in place. Avoid mounting the charger directly onto batteries or near flammable materials. Maintain adequate clearance around the unit for proper airflow and access for maintenance. Following these guidelines will ensure a safe and reliable installation, maximizing the benefits of your NOCO Genius 5×2.

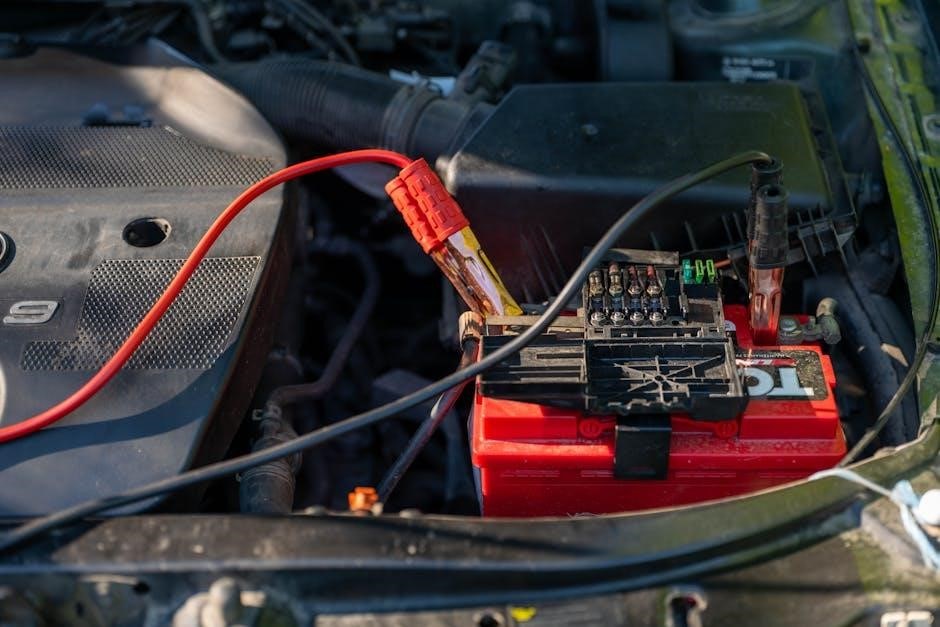
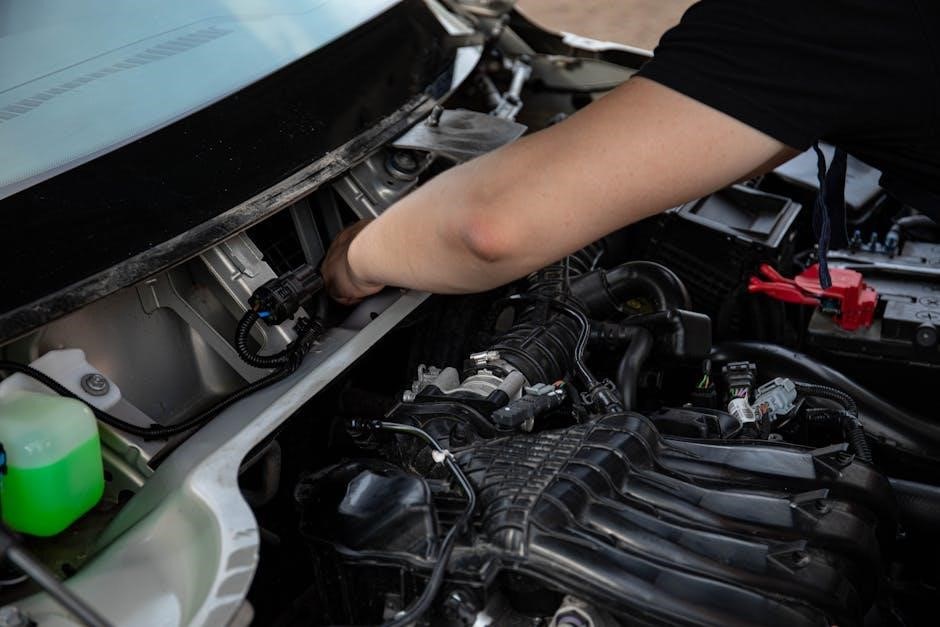
Connecting to the Batteries

Proper battery connection is vital for safe and effective charging with the NOCO Genius 5×2. Begin by ensuring the charger is switched off before making any connections. Attach the supplied battery cables to the corresponding terminals – red for positive (+) and black for negative (-). Securely clamp the connectors to the battery posts, ensuring a clean and firm connection.

NOCO recommends connecting each port to an individual battery, avoiding parallel connections directly to the charger. A Reddit discussion highlighted a user experiencing charger failure after attempting a parallel setup. Double-check polarity before powering on to prevent damage. The Genius 5×2 independently manages each bank, optimizing charging for different battery types and states of charge.

Parallel Connection Considerations (Reddit Discussion)

A discussion on r/batteries reveals potential issues when connecting batteries in parallel directly to the NOCO Genius 5×2. One user reported their charger failed within a month after hooking it up to a dual battery system connected in parallel. While the initial thought was to utilize the two banks for a combined parallel setup, NOCO explicitly advises against this approach.

The concern stems from the charger’s inability to independently manage a parallel circuit, potentially leading to uneven charging and stress on the internal components. It’s crucial to understand that the Genius 5×2 is designed for individual battery bank charging, not for directly servicing a combined parallel system. Connecting to each battery separately is the recommended and safer method.

Independent Port Connection (Recommended by NOCO)

NOCO strongly recommends connecting each battery to a separate port on the Genius 5×2. This ensures independent charging and control of each battery bank, maximizing the charger’s effectiveness and preventing potential issues associated with parallel connections. By utilizing both ports, you can simultaneously maintain two 12-volt batteries, each receiving up to 5 amps of charging current.

This method allows the charger to accurately assess the individual needs of each battery and apply the appropriate charging mode – 12V, 12V AGM, 12V Lithium, or 12V Repair. It’s the safest and most reliable way to leverage the Genius 5×2’s capabilities, extending battery life and ensuring optimal performance for both batteries.

Initial Power-Up and Self-Test

Upon connecting the NOCO Genius 5×2 to a power source, the unit performs an automated self-test. This diagnostic sequence verifies the functionality of all internal components, including the charging circuits, sensors, and safety features. During the self-test, the indicator lights will cycle through a series of patterns, confirming operational readiness.

A successful self-test is indicated by a steady green light on each bank, signifying that the charger is functioning correctly and prepared to begin charging. If any errors are detected during the self-test, a red light will illuminate, indicating a potential issue requiring attention. Refer to the troubleshooting section of this manual for further guidance.

Operation and Charging Modes

The NOCO Genius 5×2 offers automatic charging and selectable modes – 12V, 12V AGM, 12V Lithium, and 12V Repair – for optimized battery maintenance and performance.

Automatic Charging Operation

The NOCO Genius 5×2 excels in fully automatic operation, simplifying battery maintenance for users of all experience levels. Upon connection to a battery, the charger intelligently assesses the battery’s state of charge and automatically begins the appropriate charging cycle. This eliminates the need for manual mode selection in most scenarios, making it exceptionally user-friendly.

The charger cycles through bulk, absorption, and float stages to ensure complete and safe charging. It continuously monitors the battery’s voltage and current, adjusting the charging process as needed. Furthermore, the Genius 5×2 can actively monitor battery health over extended periods, initiating a maintenance charge when voltage drops below optimal levels, effectively prolonging battery life. This automatic functionality makes it ideal for long-term storage or seasonal use.

Charging Mode Selection

The NOCO Genius 5×2 offers selectable charging modes to optimize performance for different battery chemistries. While designed for fully automatic operation, choosing the correct mode enhances charging efficiency and battery lifespan. Available modes include 12V, 12V AGM, and 12V Lithium, catering to a wide range of battery types commonly found in marine and automotive applications.

Selecting the appropriate mode ensures the charger delivers the correct voltage and current for the specific battery. The 12V Repair mode is designed to attempt recovery of deeply discharged batteries, but should be used cautiously. The charger’s intuitive design allows for easy mode selection, ensuring users can tailor the charging process to their specific needs. Proper mode selection is crucial for maximizing battery health and performance.

12V Charging Mode

The 12V Charging Mode is the standard setting for traditional lead-acid batteries, commonly used in many automotive and marine applications. This mode delivers a conventional charging profile, suitable for flooded, gel, and wet-cell lead-acid batteries. The Genius 5×2 automatically adjusts the charging process based on the battery’s condition, transitioning through bulk, absorption, and float stages to ensure optimal charging.

This mode is designed to be completely automatic, requiring no user intervention or technical knowledge. The charger safely and efficiently replenishes the battery’s charge, preventing overcharging and maximizing its lifespan. It’s a versatile option for general-purpose battery maintenance and charging, providing a reliable solution for keeping batteries in top condition.

12V AGM Charging Mode

The 12V AGM Charging Mode is specifically tailored for Absorbed Glass Mat (AGM) batteries, a type of sealed lead-acid battery known for its enhanced performance and maintenance-free design. This mode utilizes a specialized charging algorithm optimized for the unique characteristics of AGM batteries, ensuring efficient and safe charging.

Unlike traditional lead-acid batteries, AGM batteries require a different voltage profile during charging. The Genius 5×2’s 12V AGM mode delivers a precise charging process, preventing overcharging and maximizing the battery’s lifespan. It’s ideal for applications where AGM batteries are commonly used, such as marine vessels, RVs, and powersports vehicles, offering a reliable and convenient charging solution.

12V Lithium Charging Mode

The 12V Lithium Charging Mode is engineered for lithium (LiFePO4) batteries, increasingly popular due to their lightweight design, high energy density, and extended cycle life. This mode employs a unique charging algorithm specifically designed to meet the demands of lithium battery chemistry, ensuring optimal performance and safety.

Lithium batteries require a precise charging profile, differing significantly from lead-acid or AGM batteries. The Genius 5×2’s 12V Lithium mode delivers a constant current/constant voltage (CC/CV) charge, preventing overcharging and maximizing battery lifespan. It’s perfect for modern applications like electric vehicles, solar energy storage, and high-performance marine systems, providing a reliable and efficient charging solution for these advanced battery technologies.

12V Repair Mode

The 12V Repair Mode is a unique feature designed to revitalize sulfated or deeply discharged lead-acid batteries. This mode utilizes a high-frequency, low-voltage pulse to break down lead sulfate crystals that accumulate on the battery plates, hindering performance. It’s not a guaranteed fix, but it can often restore capacity to batteries deemed unusable by conventional chargers.

This process can take several hours, even days, depending on the severity of the sulfation. The Genius 5×2 intelligently monitors the battery’s response and adjusts the pulse accordingly. It’s important to note that the Repair Mode is most effective on batteries that haven’t been deeply discharged for extended periods; severely damaged batteries may not be recoverable. The charger actively monitors and intuitively repairs damaged batteries.

Troubleshooting and Maintenance

This section details common issues, solutions, and preventative maintenance for the NOCO Genius 5×2, ensuring reliable operation and extending both charger and battery life.

Common Issues and Solutions

Charger Failure: A Reddit user reported a NOCO Genius 5×2 failing after only one month of use. If the unit stops functioning, verify the power source and connections. Contact NOCO support for assistance, as a replacement may be necessary.

Battery Not Charging: Ensure proper connection to the battery terminals – positive to positive, negative to negative. Confirm the selected charging mode matches the battery type (Lead-Acid, AGM, or Lithium). A damaged battery may also prevent charging; utilize the Repair Mode.

Repair Mode Issues: While the Genius 5×2 can attempt to repair damaged batteries, success isn’t guaranteed. If Repair Mode fails, the battery may be beyond recovery and require replacement. Always monitor the charging process and disconnect if overheating occurs.

Incorrect Mode Selection: Using the wrong charging mode can damage the battery. Refer to the manual for proper settings based on your battery type.

Battery Repair Mode Functionality

The NOCO Genius 5×2’s Repair Mode is designed to attempt recovery of deeply discharged or sulfated batteries. This mode utilizes a high-frequency pulse to break down lead sulfate crystals that form on the battery plates, hindering performance. It’s not a guaranteed fix, but can often restore capacity in neglected batteries.

Operation: Repair Mode initiates a series of controlled pulses, followed by a standard charging cycle. The duration varies depending on the battery’s condition. Monitor closely for overheating or excessive gassing during the process.

Limitations: Severely damaged or physically broken batteries won’t be revived. Repair Mode is most effective on batteries that have been slowly discharged over time, not those with internal shorts. If the mode fails after several attempts, the battery likely needs replacement.

Safety: Always use in a well-ventilated area, as charging can produce explosive gases.

Extending Battery Life with NOCO Genius 5×2

The NOCO Genius 5×2 significantly extends battery life through intelligent charging and maintenance. Consistent use prevents sulfation, a primary cause of battery failure, by ensuring batteries remain fully charged. Regular maintenance charging, even when not in use, combats self-discharge and keeps batteries ready for optimal performance.

Optimal Charging: Utilizing the correct charging mode (Lead-Acid, AGM, or Lithium) is crucial. The Genius 5×2 automatically adjusts voltage and current, preventing overcharging or undercharging.

Desulfation: The Repair Mode can revitalize sulfated batteries, adding years to their lifespan. Proactive maintenance with the Genius 5×2 minimizes the need for costly battery replacements, offering long-term savings and reliability.

Monitoring: Regularly check battery health and charging status via the charger’s indicators.

Open post

manual transmission issues

Manual transmissions, while known for reliability, aren’t immune to problems; understanding potential failures is crucial for vehicle longevity and safe operation.

These systems rely on precise mechanical interaction, making them susceptible to wear and tear over time, leading to various operational difficulties.

Common issues range from fluid leaks and slipping clutches to internal damage, impacting shifting smoothness and overall performance, requiring prompt attention.

Overview of Manual Transmissions

Manual transmissions represent a traditional method of transferring engine power to the wheels, relying on a driver-operated clutch and a series of gears to control speed and torque. Unlike automatic transmissions, they offer direct mechanical engagement, providing drivers with greater control and often, improved fuel efficiency. The core components include the gearbox housing, gears of varying sizes, shafts, synchronizers, bearings, and the clutch assembly.

The process begins with the engine’s rotational force entering the transmission. The driver selects the appropriate gear using the shift lever, which engages specific gear sets within the transmission. Synchronizers play a vital role in smoothly matching the speeds of the gears before engagement, preventing grinding. The clutch disengages the engine from the transmission during gear changes, allowing for seamless shifts.

Historically favored for their simplicity and durability, manual transmissions are still prevalent in many vehicles, particularly those prioritizing driver engagement and performance. However, their complexity means they are susceptible to wear and tear, requiring regular maintenance and occasional repairs to ensure optimal functionality.

Why Manual Transmissions Fail

Manual transmission failures stem from a variety of factors, primarily related to wear and tear from consistent mechanical stress. Frequent and forceful shifting, coupled with a lack of proper maintenance, accelerates component degradation. Worn synchronizers, crucial for smooth gear changes, often fail due to constant friction, leading to grinding noises and difficulty shifting.

Shift linkage wear is another common culprit, causing imprecise gear selection and potentially allowing the transmission to pop out of gear. Internal damage to gears themselves can occur from improper lubrication or impacts. Furthermore, bearing failures, often caused by contamination or age, introduce noise and vibration.

Neglecting regular fluid checks and changes contributes significantly to transmission problems, as degraded fluid loses its lubricating properties. High-pressure systems continuously operating can compromise seals, though less common in manuals than automatics. Ultimately, a combination of these factors leads to diminished performance and eventual failure.

Common Symptoms of Manual Transmission Problems

Recognizing issues early is key; symptoms include difficulty shifting, grinding gears, clutch slippage, unusual noises (buzzing, clicking, clunking, humming), and, rarely, fluid leaks.

Difficulty Shifting Gears

Experiencing trouble getting your manual transmission into gear is a common indicator of underlying problems. This can manifest in several ways, from a general stiffness when attempting to shift, to an inability to select certain gears altogether. Often, this difficulty is more pronounced when the engine is cold, but it can persist even after the vehicle has warmed up.

A primary cause is often worn synchronizers, components crucial for matching the speed of the gears during shifts. When these wear, they struggle to smoothly engage, resulting in resistance. However, shift linkage wear can also contribute, creating slack in the system and making precise gear selection challenging. In more severe cases, internal damage to the gears themselves could be the culprit, requiring a more extensive repair. Ignoring this symptom can lead to further damage and potentially complete transmission failure.

Grinding Gears

Hearing a grinding noise when attempting to shift gears is a particularly concerning symptom of manual transmission issues. This harsh sound indicates that the gears aren’t smoothly engaging, and are instead colliding with each other. This is often a direct result of worn synchronizers, which are responsible for matching gear speeds before engagement. When synchronizers are failing, they can’t properly synchronize, leading to that unmistakable grinding sound.

However, grinding can also stem from improper driving technique – rushing shifts without fully depressing the clutch. While occasional grinding might not cause immediate damage, consistent grinding accelerates wear on the gears themselves. Ignoring this issue can lead to significant internal damage, potentially requiring a complete transmission rebuild or replacement. Prompt diagnosis and repair are crucial to prevent further, more costly problems.

Clutch Slippage

Clutch slippage is a frequent indicator of manual transmission problems, particularly noticeable during acceleration. It manifests as the engine revving higher than expected without a corresponding increase in vehicle speed. This occurs when the clutch disc isn’t fully engaging with the flywheel, causing it to slip instead of transferring power efficiently. Several factors can contribute to this, including a worn clutch disc, contaminated clutch surfaces (from oil or grease), or issues with the clutch hydraulics.

Unlike automatic transmissions, manual systems rely heavily on the clutch for power transfer. Prolonged slippage generates excessive heat, accelerating wear on the clutch components. If left unaddressed, it can lead to complete clutch failure, leaving you stranded. It’s important to differentiate clutch slippage from other issues, but it’s a clear sign that attention is needed.

Transmission Fluid Leaks

Transmission fluid leaks, while less common in manual transmissions compared to automatics, are still a significant concern when they occur. Manual transmissions utilize fluid – typically gear oil – to lubricate internal components and ensure smooth operation. Leaks can stem from compromised seals, damaged gaskets, or even cracks in the transmission casing itself. Identifying the source and type of fluid is crucial for proper diagnosis.

Because manual transmissions operate with high pressure, even a small leak can escalate quickly. Reduced fluid levels lead to increased friction and wear, potentially causing significant internal damage. Regularly inspecting for fluid puddles under the vehicle, and checking the fluid level (if applicable), can help catch leaks early. Addressing leaks promptly prevents costly repairs and maintains transmission health.

Unusual Noises During Operation

Unusual noises emanating from the transmission are often early indicators of underlying mechanical issues within a manual system. These sounds can manifest in various forms, each potentially signaling a different problem. Buzzing sounds might suggest issues with bearings or gear meshing, while clicking sounds could indicate worn synchronizers struggling to engage gears smoothly.

More concerning are clunking sounds, which often point to significant internal damage or loose components. Humming or roaring sounds can indicate bearing failures or low fluid levels increasing friction. Remember, you know your vehicle best; any new or changing sound warrants investigation. Ignoring these auditory cues can lead to more extensive and expensive repairs down the line, potentially resulting in complete transmission failure.

Buzzing Sounds

Buzzing sounds originating from the manual transmission often suggest a problem within the gear train or associated components. These vibrations can stem from worn or damaged bearings, creating a resonant frequency as the transmission operates. Improper gear meshing, potentially due to worn teeth or misalignment, can also generate a buzzing noise. It’s crucial to differentiate this sound from engine-related buzzing, which typically has a different pitch and source.

A mechanic’s inspection is vital to pinpoint the exact cause, as ignoring a buzzing sound can lead to further damage. The sound may become more pronounced during specific gear engagements or under load. Early diagnosis and repair can prevent more significant, costly issues from developing within the transmission system, ensuring continued smooth operation.

Clicking Sounds

Clicking sounds emanating from a manual transmission frequently indicate issues within the synchronizers or shift linkage. Synchronizers, responsible for matching gear speeds, can click when worn, especially during gear changes. This clicking often occurs when attempting to shift into a specific gear, signaling a need for inspection and potential replacement. A failing shift linkage, connecting the gear lever to the transmission, can also produce clicking as components loosen or wear.

Because “nobody knows the sounds of your car better than you,” any new clicking should be investigated promptly. Ignoring these sounds can lead to difficulty shifting or even gears popping out of engagement. A professional diagnosis is essential to determine the source and prevent further damage to the transmission system, ensuring safe and reliable operation.

Clunking Sounds

Clunking sounds originating from the manual transmission are often a sign of more serious internal mechanical problems. These noises typically suggest loose or damaged gears, worn bearings, or issues within the differential. The sound is often most noticeable during gear changes, acceleration, or deceleration, indicating a significant impact between components. Ignoring clunking sounds can lead to catastrophic failure of the transmission, resulting in costly repairs or complete replacement.

As stated, if you “suddenly start to hear something you weren’t hearing before,” it’s crucial to seek professional attention. A mechanic can accurately diagnose the source of the clunking and recommend appropriate repairs. Prompt intervention can prevent further damage and ensure the continued safe operation of your vehicle, avoiding potentially dangerous situations.

Humming or Roaring Sounds

Humming or roaring sounds emanating from the manual transmission often indicate bearing failures or issues with the gears themselves. These noises typically increase with vehicle speed, suggesting a problem within the rotating components of the transmission. A consistent humming can point to worn wheel bearings, while a more pronounced roaring sound often signifies damaged gears or a failing differential. These sounds are a clear indication that internal parts are experiencing excessive friction and wear.

According to available information, if you experience “a buzzing, clicking, clunking, humming, or roaring” sound, your transmission may be attempting to communicate a problem. Ignoring these sounds can lead to further damage and eventual transmission failure, necessitating expensive repairs. A professional inspection is vital for accurate diagnosis and timely intervention.

Specific Mechanical Issues

Mechanical failures within a manual transmission often involve worn synchronizers, shift linkage wear, or internal gear damage, impacting smooth operation and requiring repair.

Worn Synchronizers

Synchronizers are critical components within a manual transmission, responsible for matching the speeds of the gears before engagement, ensuring smooth and quiet shifting. Over time, these synchronizers experience wear due to the constant friction during gear changes. This wear manifests as difficulty shifting, particularly into specific gears, and the infamous grinding noise when attempting to change gears.

As synchronizers degrade, the speed matching process becomes less effective, leading to increased stress on the gears themselves. A worn synchronizer doesn’t eliminate the speed difference entirely, causing the gears to clash. European Auto Shop highlights that a worn synchronizer is a frequent cause of shifting problems. Identifying and replacing worn synchronizers is essential to restore smooth operation and prevent further damage to the transmission. Ignoring this issue can lead to more extensive and costly repairs down the line.

Shift Linkage Wear

Shift linkage connects the gear shifter in the cabin to the transmission itself, translating driver input into gear changes. This system, comprised of rods, cables, or levers, is susceptible to wear and looseness over time, particularly in older vehicles. Quora and Autoscope both emphasize shift linkage wear as a common issue, often resulting in sloppy gear engagement or the sensation of gears popping out of place.

As the linkage components wear, play develops, reducing the precision of gear selection. This can manifest as difficulty finding the desired gear, a vague or imprecise shifter feel, and even the inability to fully engage a gear. Firmly moving the shifter might temporarily resolve the issue, but this is a symptom, not a solution. Addressing shift linkage wear involves inspecting the components for damage or excessive play and replacing worn parts to restore accurate and reliable gear changes.

Internal Damage to Gears

Internal gear damage within a manual transmission represents a serious issue, often stemming from prolonged neglect, aggressive driving, or insufficient lubrication. While not explicitly detailed in the provided sources, the general understanding of manual transmission failure points to this as a potential cause of significant operational problems. Damage can range from chipped or worn teeth to complete gear failure, severely impacting the transmission’s ability to function correctly.

Such damage typically manifests as loud, grinding noises during gear changes, difficulty selecting gears, or a complete inability to shift. The resulting metal debris can further contaminate the transmission fluid, accelerating wear on other components. Repairing internal gear damage usually necessitates a complete transmission rebuild or replacement, a costly undertaking. Preventative maintenance, including regular fluid changes and proper shifting techniques, is crucial to mitigate the risk of internal gear failure.

Bearing Failures

Bearing failures within a manual transmission, though not directly highlighted in the provided snippets, are a common consequence of wear and tear, and contribute significantly to unusual noises. These bearings support the rotating shafts and gears, and when they degrade, they introduce play and friction into the system. This leads to a cascade of potential problems, impacting shifting smoothness and overall transmission efficiency.

Symptoms of bearing failure often include humming, roaring, or even clicking sounds emanating from the transmission, particularly during operation. As the bearings worsen, these noises become more pronounced. Ignoring bearing failures can lead to further damage to gears and shafts, ultimately necessitating a complete transmission overhaul. Regular fluid checks and addressing any unusual noises promptly are vital preventative measures to extend the lifespan of these critical components and avoid costly repairs.

Diagnosis and Repair

Accurate diagnosis, often requiring a professional inspection, is key to resolving manual transmission issues; identifying noise sources is paramount for effective repair strategies.

Professional Inspection

A comprehensive professional inspection is the cornerstone of accurately diagnosing manual transmission problems. Experienced mechanics possess the expertise to identify subtle issues often missed by the untrained eye. This involves a thorough external examination, checking for fluid leaks – though less common in manuals than automatics – and assessing the condition of the shift linkage.

Crucially, a skilled technician will perform a road test, carefully listening for unusual noises like buzzing, clicking, clunking, humming, or roaring, as these sounds can pinpoint internal damage or worn components. They’ll evaluate gear engagement quality, noting any difficulty shifting or instances of grinding. Internal inspection may necessitate transmission removal to assess synchronizer wear, gear damage, and bearing failures. Proper diagnosis avoids unnecessary repairs and ensures a lasting solution, saving both time and money.

Fluid Level Checks

While manual transmissions don’t rely on fluid to the same extent as automatics, checking the fluid level remains a vital preventative measure. Low fluid can contribute to synchronizer wear and difficulty shifting, though significant leaks are less frequent in manual systems. Locate the fill plug, typically on the side of the transmission, and carefully remove it.

The fluid level should be at the specified mark, often near the fill plug opening. If low, top it off with the manufacturer-recommended gear oil. Inspect the fluid’s condition; it should be clean and free of metallic particles, indicating internal wear. Dark or contaminated fluid suggests a need for a complete fluid change. Remember, regular fluid checks, alongside changes, help maintain optimal lubrication and protect internal components, extending the transmission’s lifespan and ensuring smooth operation.

Identifying the Source of Noises

Unusual sounds emanating from the transmission are often early indicators of underlying problems. A buzzing sound could signal issues within the transmission itself, while clicking noises might point to worn or damaged components. Clunking sounds frequently suggest problems with the shift linkage or internal gear engagement.

Humming or roaring sounds, especially noticeable during acceleration, can indicate bearing failures or gear damage. Carefully listen to when the noise occurs – during shifting, acceleration, deceleration, or neutral – to narrow down the potential source. Remember, you know your car’s normal sounds best; any sudden changes warrant investigation. A professional mechanic can accurately pinpoint the noise’s origin and recommend appropriate repairs, preventing further damage and ensuring safe operation.

Preventative Maintenance

Regular fluid changes, proper shifting techniques, and promptly addressing any emerging issues are vital for extending the life of your manual transmission system.

Regular Fluid Changes

Maintaining the correct fluid level and ensuring it remains clean is paramount for a healthy manual transmission. Unlike automatic transmissions, manual transmissions don’t typically experience large-scale fluid leaks as frequently, but fluid degradation and contamination still occur over time.

Regular fluid changes – following the manufacturer’s recommended intervals – lubricate moving parts, reducing friction and wear. This preventative measure minimizes the risk of synchronizer wear and internal damage to gears.

Old, contaminated fluid loses its lubricating properties, accelerating component failure. Checking the fluid level periodically is also essential; low fluid levels can lead to grinding gears and difficulty shifting. Using the correct type of transmission fluid, as specified in your vehicle’s owner’s manual, is absolutely critical for optimal performance and longevity.

Proper Shifting Techniques

Employing correct shifting practices significantly extends the life of a manual transmission and prevents premature wear. Avoid “speed shifting” or forcing the gear lever, as this puts undue stress on synchronizers and shift linkage components.

Fully depress the clutch pedal before each gear change, ensuring complete disengagement of the engine from the transmission. Smooth, deliberate movements are key; rushing shifts can cause grinding and damage to the gears.

Downshifting should be performed with a rev-matching technique to synchronize engine speed with the lower gear, reducing stress on the transmission. Recognizing when to shift based on engine RPM and vehicle speed also contributes to longevity. Sloppy or imprecise shifting can accelerate shift linkage wear, potentially leading to gears popping out.

Addressing Issues Promptly

Ignoring early signs of manual transmission trouble can escalate minor problems into costly repairs. Unusual noises – buzzing, clicking, clunking, humming, or roaring – should never be dismissed; they often indicate internal wear or damage.

Difficulty shifting gears or experiencing grinding during changes demands immediate attention, potentially signaling worn synchronizers or linkage issues. Any noticeable clutch slippage requires prompt diagnosis, as it could stem from wear or fluid contamination.

Even seemingly minor issues, like a slight change in shifting feel, warrant investigation by a qualified mechanic. Delaying repairs can lead to more extensive internal damage, potentially requiring a complete transmission overhaul or replacement, significantly increasing repair costs.

Open post

craftsman air compressor owners manual

Welcome to the Craftsman Air Compressor Owner’s Manual, your comprehensive guide to safe and efficient operation. This manual covers essential safety, assembly, and maintenance procedures to ensure optimal performance and longevity of your equipment.

1.1 Overview of the Manual

This manual provides a detailed guide for the safe and efficient operation of your Craftsman Air Compressor. It includes essential safety precautions, assembly instructions, and maintenance tips to ensure optimal performance. The manual covers topics such as proper installation, daily checks, and troubleshooting common issues. By following the guidelines outlined, you can maximize the lifespan and efficiency of your air compressor while minimizing potential hazards. This comprehensive resource is designed to help you understand and utilize your equipment effectively, ensuring a safe and productive experience.

1.2 Importance of Reading the Manual

Reading the Craftsman Air Compressor Owner’s Manual is crucial for safe and efficient operation. It provides essential safety guidelines, assembly instructions, and maintenance tips to ensure optimal performance. Understanding the duty cycle, proper ventilation, and lubrication requirements prevents damage and extends the compressor’s lifespan. The manual also helps troubleshoot common issues and ensures compliance with warranty terms. By following the guidelines, users can avoid hazards, maintain efficiency, and enjoy reliable service from their air compressor. Take the time to read thoroughly to maximize safety and performance.

Safety Guidelines and Precautions

Always follow safety guidelines to prevent accidents. Wear protective gear, ensure proper ventilation, and avoid overloading. Adhere to the recommended 50% duty cycle for safe operation.

2.1 General Safety Instructions

Always wear protective eyewear and ensure proper ventilation when operating the air compressor. Keep loose clothing and long hair tied back to avoid entanglement. Never touch hot surfaces or electrical components. Ensure the compressor is placed on a stable, level surface. Avoid overloading the unit, as this can lead to malfunction. Follow the recommended duty cycle (50%) to prevent overheating. Keep flammable materials away from the compressor. Regularly inspect hoses and connections for damage or leaks. Adhere to all safety guidelines outlined in this manual to ensure safe and efficient operation.

2.2 Handling Compressed Air Safely

Always follow safety guidelines when handling compressed air to prevent accidents. Ensure the system operates within the recommended pressure ratings and duty cycle limits (50% duty cycle: 5 minutes of operation in any 10-minute period). Use approved hoses and fittings to avoid leaks or ruptures. Never exceed the compressor’s maximum pressure rating, as this can lead to system overload. Regularly inspect hoses and connections for wear or damage. Proper handling ensures safe and efficient operation of your Craftsman air compressor.

2.3 Proper Ventilation Requirements

Proper ventilation is crucial for safe and efficient operation of your Craftsman air compressor. Ensure the unit is placed in a well-ventilated area to prevent carbon monoxide buildup and reduce moisture accumulation. Avoid operating the compressor in confined or poorly ventilated spaces, as this can lead to hazardous conditions. If used indoors, consider installing ventilation systems to maintain air quality. Always follow ventilation guidelines to ensure optimal performance and longevity of your equipment.

Assembly and Installation

Proper assembly and installation are crucial for safe and efficient operation. Follow step-by-step instructions for unpacking, inventory, and mounting to ensure correct setup and functionality.

3.1 Unpacking and Inventory

Begin by carefully unpacking your Craftsman air compressor from its shipping box. Inspect the unit for any visible damage during transit. Next, verify the contents against the provided parts list in the manual to ensure all components are included. This step is crucial to avoid missing items that may delay assembly. Once unpacked, organize the parts and accessories in a clean, dry workspace. Before proceeding with assembly, double-check that all hardware and instructions are accounted for. This systematic approach ensures a smooth setup process. Proper inventory helps prevent delays and ensures all necessary parts are readily available.

3.2 Step-by-Step Assembly Instructions

Begin by unpacking and inventorying all components. Attach the wheels and handle to the compressor unit using the provided hardware. Next, install the air filter by threading it onto the intake port. Connect the pressure gauge and relief valve, ensuring they are securely tightened. Mount the control panel and connect the electrical wiring according to the diagram. Finally, attach the air hose to the outlet port and test for leaks. Refer to the diagrams for precise alignment and tightening specifications. Always maintain a 50% duty cycle for optimal performance.

3.3 Mounting and Leveling the Compressor

Proper mounting and leveling of your Craftsman air compressor are crucial for stable operation and longevity. Begin by placing the unit on a firm, flat surface. Use a spirit level to ensure the compressor is perfectly horizontal. Tighten all mounting bolts securely to prevent vibration. If installing on a uneven floor, use shims to achieve proper leveling. Ensure the area around the compressor is well-ventilated to prevent overheating. Follow the manufacturer’s guidelines for mounting hardware and spacing requirements to guarantee safe and efficient performance.

Operating the Air Compressor

Understand the control panel, start/stop procedures, and pressure adjustments. Maintain a 50% duty cycle to prevent overheating, ensuring efficient and safe operation of your Craftsman air compressor.

4.1 Understanding the Control Panel

The control panel is the central command center of your Craftsman air compressor, featuring essential gauges, switches, and regulators. It displays pressure levels, power settings, and operational status. Familiarize yourself with the pressure gauge, on/off switch, and regulator knob to adjust output pressure. The panel also includes indicators for duty cycle limits, ensuring proper operation within recommended guidelines. Always refer to the manual for detailed instructions on optimizing settings for your specific tasks.

4.2 Starting and Stopping the Compressor

To start the compressor, ensure the power source is connected and the pressure switch is in the “on” position. Allow the tank to fill before use. For stopping, switch off the power and let the unit cool. Always drain the tank after use to prevent moisture buildup. Adhere to the recommended 50% duty cycle to avoid overheating. Proper startup and shutdown procedures ensure efficient operation and extend the compressor’s lifespan. Follow these steps carefully to maintain performance and safety.

4.3 Adjusting Pressure Settings

To adjust the pressure settings on your Craftsman air compressor, locate the pressure regulator knob. Turn the knob clockwise to increase pressure or counterclockwise to decrease it. Ensure the pressure setting aligns with your tool’s requirements. The compressor’s duty cycle recommends not exceeding 5 minutes of continuous operation in any 10-minute period. Proper pressure adjustment ensures efficient performance and prevents overload. Always refer to the manual for specific pressure recommendations for your model. Correct settings optimize tool functionality and extend equipment lifespan. Adjust carefully to avoid over-pressurization, which can damage components or compromise safety.

Maintenance and Service

Regular maintenance ensures optimal performance. Perform daily checks, lubricate moving parts, and replace air filters as needed. Adhere to the recommended 50% duty cycle to prevent overheating and extend lifespan.

5.1 Daily Maintenance Checks

Regular daily inspections ensure your Craftsman air compressor operates efficiently and safely. Start by checking the oil level in the pump and topping it off as needed. Inspect hoses and connections for leaks or damage. Verify that all pressure gauges are functioning correctly and that the tank drain valve is not clogged. Clean or replace the air filter to maintain proper airflow. Finally, ensure the compressor is operating within the recommended 50% duty cycle to prevent overheating and extend its lifespan.

5.2 Lubrication Requirements

Regular lubrication is essential for maintaining your Craftsman air compressor’s performance and longevity. Use SAE 30 non-detergent oil, as specified in the manual. Check the oil level daily before operation and top it off if necessary. Replace the oil every 500 hours of use or as indicated by visible contamination. Proper lubrication ensures smooth operation of moving parts and prevents overheating. Refer to the manual for oil capacity and recommended brands. Neglecting lubrication can lead to premature wear and potential compressor failure.

5.3 Replacing Air Filters

Regular replacement of air filters is crucial for maintaining your Craftsman air compressor’s performance and efficiency. Over time, filters accumulate dust and debris, restricting airflow and reducing compression efficiency. Replace the filter every 1,000 to 2,000 hours of operation or as specified in the manual. Turn off the compressor and allow it to cool before removing the filter. Dispose of the old filter responsibly and install a new one by aligning it properly and securing it firmly. This ensures clean air intake and optimal compressor function.

  • Shut off the compressor and let it cool.
  • Locate and remove the old filter.
  • Install a new filter, ensuring a tight seal.
  • Dispose of the old filter responsibly.

Use genuine Craftsman replacement parts for best results.

Troubleshooting Common Issues

Identify and resolve common problems like low air pressure or motor overload. Reset the pressure switch or check for blockages. Refer to the manual for detailed solutions.

6.1 Identifying Common Problems

Common issues with your Craftsman air compressor may include duty cycle overload, low air pressure, or improper ventilation. These problems often arise from neglecting maintenance or exceeding the recommended usage limits. Pay attention to unusual noises, slow tank filling, or frequent shutdowns, as these can indicate underlying issues. Always refer to the troubleshooting section for detailed solutions and ensure proper operation to prevent further complications. Regular checks and adherence to safety guidelines can help identify and resolve problems early, ensuring efficient and safe compressor performance.

6.2 Resetting the Pressure Switch

Resetting the pressure switch is essential if the compressor shuts off due to overpressure or power interruption. To reset, turn off the compressor, allow it to cool, and locate the pressure switch near the tank. Press and release the reset button firmly. If the issue persists, check for air leaks or blockages. Ensure the duty cycle is maintained at 50% to prevent overload. Always refer to the manual for specific reset procedures to avoid damage or safety hazards.

6.3 Diagnosing Low Air Pressure

Low air pressure in your Craftsman air compressor can result from clogged air filters, improper pressure settings, or leaks in the system. Start by inspecting the air filter and replacing it if dirty. Check the pressure switch for accurate settings and ensure all hoses and connections are secure. If issues persist, consult the manual for guidance or contact customer support for assistance. Regular maintenance, such as filter replacements, can help prevent pressure-related problems and ensure optimal performance.

Repair and Replacement Parts

Sears Parts Direct offers genuine replacement parts and detailed diagrams for your Craftsman air compressor. Use these resources to identify and install components correctly, ensuring safety and warranty compliance.

7.1 Locating Replacement Parts

To find replacement parts for your Craftsman air compressor, refer to the manual or visit Sears Parts Direct. They offer a wide range of genuine parts and detailed diagrams. Additionally, you can download the manual from the official Craftsman website or authorized dealers. Ensure to use the correct model number, such as Craftsman 919167620, for accurate part identification. For further assistance, contact Craftsman customer support or consult online resources for guidance on purchasing and installing components.

7.2 Installing New Components

When installing new components in your Craftsman air compressor, always follow the manufacturer’s instructions and safety guidelines. Ensure you use genuine Craftsman parts for compatibility and reliability. Shut off the power supply and drain the tank before starting any installation. Refer to the parts diagram in your manual to locate the component. Follow the step-by-step instructions provided for each specific part. Tighten all connections securely and test the system for leaks or proper function. Keep track of all replaced parts for future reference and maintenance scheduling.

  • Turn off and unplug the compressor.
  • Drain the air tank completely.
  • Install the new component as instructed.
  • Test the system for leaks or issues.

7.3 Warranty and Service Centers

Your Craftsman air compressor is backed by a comprehensive warranty program. For warranty-related inquiries or repairs, locate authorized service centers through Sears Parts Direct or the official Craftsman website. These centers provide genuine replacement parts and expert assistance. Ensure to keep your proof of purchase and adhere to warranty terms for coverage. Authorized service centers guarantee reliable and efficient support, maintaining your compressor’s performance and extending its lifespan. Visit the official Craftsman website for a detailed list of service centers near you.

Applications and Limitations

Ideal for small workshops and home use, this compressor supports various tools but must operate within a 50% duty cycle to avoid overload and ensure longevity.

8.1 Suitable Applications for the Compressor

The Craftsman Air Compressor is ideal for various applications, including powering pneumatic tools, inflating tires, and supporting small-scale industrial or DIY projects. It is designed for intermittent use, making it perfect for workshops, garages, or job sites requiring reliable air power. The compressor is well-suited for tasks like spraying, sanding, and drilling, ensuring efficient performance. Always adhere to the recommended duty cycle to maintain optimal functionality and extend the lifespan of the equipment.

8.2 Understanding Duty Cycle Limits

The duty cycle of your Craftsman air compressor refers to the percentage of time it can operate within a 10-minute period. A 50% duty cycle means the compressor should run no more than 5 minutes in any 10-minute span. Exceeding this limit can lead to overheating and reduced lifespan. Always monitor usage to ensure adherence to these guidelines, as they are crucial for maintaining efficiency and safety. Proper duty cycle management ensures reliable performance and extends the life of your air compressor.

8.3 Avoiding Overload Situations

To prevent overload, ensure your compressor operates within its duty cycle limits. Avoid running the unit for more than 5 minutes in any 10-minute period. Monitor the pressure gauge and allow the tank to replenish fully between cycles. Overloading can lead to overheating, reduced efficiency, and potential damage. Always match the compressor’s capacity to the task at hand and avoid excessive demand on the system. Regular maintenance, such as checking for leaks and ensuring proper ventilation, will also help prevent overload situations and extend the lifespan of your compressor.

Technical Specifications

Key performance metrics include CFM, PSI, and horsepower ratings. The compressor features a durable tank with specified capacity and pressure ratings, ensuring reliable operation within recommended duty cycles.

9.1 Key Performance Metrics

The Craftsman air compressor’s performance is measured by its duty cycle, tank capacity, and maximum pressure rating. A 50% duty cycle ensures the compressor runs efficiently without overheating. Typical models feature a 33-gallon tank and deliver up to 175 PSI, suitable for demanding applications. These metrics ensure reliable operation for tools and equipment, balancing power and durability. Monitoring these performance indicators helps maintain optimal functionality and extends the compressor’s lifespan. Always refer to the specifications in your manual for precise details tailored to your model.

9.2 Electrical and Power Requirements

Your Craftsman air compressor requires a dedicated 120V or 240V power supply, depending on the model. Ensure the circuit matches the compressor’s horsepower rating to avoid overload. The recommended current rating is specified in the manual to prevent electrical issues. Always use a grounded outlet and avoid extension cords for safe operation. Adhering to these specifications ensures efficient performance and longevity of the motor. Consult a licensed electrician if unsure about electrical compatibility or wiring requirements.

9.3 Tank Capacity and Pressure Ratings

The Craftsman air compressor features a 33-gallon tank, designed to store compressed air for consistent tool operation. The maximum pressure rating is typically 150 PSI, ensuring sufficient power for various applications. Always adhere to the recommended pressure limits to avoid damage and ensure safety. The tank’s capacity and pressure ratings are carefully engineered to balance performance and efficiency, making it suitable for both small-scale and heavy-duty tasks. Proper understanding of these specifications is crucial for optimal compressor performance and longevity.

Environmental Considerations

Properly dispose of old units, reduce noise pollution through regular maintenance, and follow energy efficiency tips to minimize environmental impact while operating your Craftsman Air Compressor.

10.1 Proper Disposal of Old Units

When disposing of your old Craftsman air compressor, ensure environmentally responsible practices. Check local regulations for handling hazardous materials, as compressors may contain oils or chemicals. Drain all fluids and remove any hazardous components before disposal. Do not dispose of the unit in landfills, as this can harm the environment. Instead, take it to an authorized recycling or disposal facility. Many communities offer special collection events for large appliances. Proper disposal helps protect the environment and adheres to local laws. Always consult local waste management agencies for guidance on safe disposal methods.

10.2 Reducing Noise Pollution

To minimize noise pollution, ensure your Craftsman air compressor is installed in a well-ventilated area away from living spaces. Regular maintenance, such as tightening loose parts and lubricating moving components, can reduce operational noise. Consider using noise-absorbing materials or installing the unit on a vibration pad to dampen sound. Additionally, operating the compressor during less noise-sensitive hours can help reduce disturbances. Proper installation and maintenance are key to minimizing noise pollution and ensuring a quieter environment.

10.3 Energy Efficiency Tips

To maximize energy efficiency, turn off the compressor when not in use and ensure proper tank sizing for your workload. Maintain the unit regularly to prevent energy waste. Use the 50% duty cycle recommendation, allowing the compressor to rest periodically. Properly insulate pipes and reduce leaks to minimize energy loss. Consider upgrading to energy-efficient motors or variable speed drives for long-term savings. Always follow the manufacturer’s guidelines for optimal performance and reduced energy consumption.

Warranty and Customer Support

Your Craftsman Air Compressor is backed by a comprehensive warranty. For inquiries, contact customer service or visit online resources for manuals, parts, and expert assistance.

11.1 Understanding the Warranty Terms

Your Craftsman Air Compressor is backed by a comprehensive warranty program. The warranty covers defective parts and labor for a specified period, typically ranging from 1 to 5 years, depending on the component. Proper installation, maintenance, and operation in accordance with the manual are required to maintain warranty validity. Misuse, overload, or failure to follow guidelines may void the warranty. For detailed terms and conditions, refer to the warranty section or contact Craftsman customer support. Ensure to register your product for streamlined service claims.

11.2 Contacting Customer Service

For assistance with your Craftsman Air Compressor, contact customer service through the official website or phone support. Sears Parts Direct offers online resources, manuals, and part diagrams. Visit their portal for troubleshooting guides, repair tips, and warranty inquiries. Ensure to have your model number, such as 919167620, ready for efficient support. Online chat and email options are also available for convenient help. Reach out to resolve issues promptly and maintain your compressor’s performance.

11.3 Online Resources and Manuals

For convenient access to additional support, Craftsman offers online resources and downloadable manuals. Visit the official Craftsman website or Sears Parts Direct to find PDF versions of your air compressor’s manual. These resources include detailed guides for troubleshooting, maintenance, and repair. Online manuals are regularly updated to ensure you have the latest information. Utilize these resources to explore troubleshooting tips, maintenance schedules, and technical specifications, ensuring optimal performance and safety. Accessing these materials helps you make the most of your air compressor’s capabilities and extends its lifespan.

Conclusion

This concludes your Craftsman Air Compressor Manual. By following the guidelines, you ensure safe, efficient operation and extend the lifespan of your equipment. Happy crafting!

12.1 Final Tips for Optimal Use

To maximize the performance and lifespan of your Craftsman air compressor, always follow the recommended duty cycle, avoiding continuous operation beyond 50%. Regularly inspect hoses and connections for leaks, and ensure proper ventilation to prevent overheating. Store the unit in a dry, cool place when not in use. Adhere to the maintenance schedule, including filter replacements and lubrication, to maintain efficiency. By following these guidelines, you’ll ensure reliable operation and extend the life of your compressor.

12.2 Encouragement for Safe Operation

Always prioritize safety when operating your Craftsman Air Compressor. Adhere to the recommended 50% duty cycle to prevent overheating and ensure efficient performance. Maintain a well-ventilated workspace to avoid hazards from compressed air. Regularly inspect hoses and connections for damage, and never exceed the maximum pressure rating. By following these guidelines, you protect yourself, others, and your equipment. Remember, safe operation ensures longevity and reliability. Review this manual periodically to stay informed and contact customer support if you have any concerns.

Open post

boss tu-3 chromatic tuner manual

Welcome to the comprehensive guide for the Boss TU-3 Chromatic Tuner Manual. This manual is essential for musicians to unlock the full potential of their TU-3 tuner, ensuring accurate and efficient tuning.

1.1 Overview of the Boss TU-3 Chromatic Tuner

The Boss TU-3 Chromatic Tuner is a highly regarded pedal tuner designed for both guitars and basses, offering precise tuning accuracy and versatility. As the successor to the popular TU-2, the TU-3 enhances functionality with improved features such as a brighter display and expanded tuning modes. Its robust design ensures durability, making it suitable for both studio and stage use. The tuner supports chromatic tuning, allowing musicians to tune all twelve semitones of the octave, as well as flat tuning options for alternative tunings. With its intuitive interface and reliable performance, the TU-3 has become a favorite among professional musicians and hobbyists alike. Its portability and ease of use make it an essential tool for maintaining perfect pitch in any musical setting.

1.2 Importance of the Manual for Optimal Use

The Boss TU-3 Chromatic Tuner Manual is indispensable for musicians seeking to maximize the tuner’s capabilities. It provides detailed instructions for navigating the device’s features, such as chromatic tuning, flat tuning options, and mode switching. Understanding these functions ensures precise tuning and adaptability to various musical settings. The manual also explains how to customize settings, like the bass string number display, and troubleshoot common issues, enhancing overall performance. By following the manual, users can avoid potential pitfalls and maintain their tuner’s accuracy and longevity. Whether you’re a professional or a hobbyist, the manual serves as a vital resource for unlocking the TU-3’s full potential and ensuring reliable operation. Referencing the manual regularly guarantees optimal use and helps musicians achieve the best possible sound from their instruments.

Features and Benefits of the Boss TU-3 Chromatic Tuner

The Boss TU-3 Chromatic Tuner offers precise chromatic tuning, a bright LED display, and durable construction. It features flat tuning options, bass string number display, and silent tuning mode for uninterrupted performance.

2.1 Chromatic Tuning Capability

The Boss TU-3 Chromatic Tuner excels with its ability to tune all twelve chromatic steps of the octave, ensuring precise tuning for any note. This feature is particularly useful for musicians who require versatility across different musical genres and instrument setups. The tuner provides clear visual feedback through its meter and stream indicators, making it easy to identify when a note is flat, sharp, or in tune. Whether you’re playing standard tuning or experimenting with alternate tunings, the TU-3’s chromatic capability delivers accuracy and reliability. This makes it an indispensable tool for both guitarists and bassists, allowing them to achieve professional-grade tuning effortlessly. The chromatic tuning feature is a cornerstone of the TU-3’s design, ensuring that your instrument sounds its best in any musical context.

2.2 High Accuracy and Bright Display

The Boss TU-3 Chromatic Tuner is renowned for its high accuracy, ensuring precise tuning with a detection range that covers all musical instruments. Its bright, large LCD display provides clear visual feedback, making it easy to read even in low-light environments. The meter lights stream from left and right toward the center when approaching the correct pitch, offering a intuitive guide for tuning. When the pitch is accurate, the lights stabilize in the center, confirming that your instrument is in tune. This feature is particularly useful for quick adjustments during performances. The tuner also features automatic muting when active, minimizing background noise. With its robust design and vivid display, the TU-3 delivers reliable performance for musicians, whether on stage or in the studio. Its accuracy and visibility make it a trusted choice for professionals and hobbyists alike;

2.3 Durable Design and Portability

The Boss TU-3 Chromatic Tuner is built with a rugged, tank-like design, ensuring durability even under heavy use. Its compact and lightweight construction makes it highly portable, perfect for musicians on the go. The pedal features a robust metal chassis, designed to withstand the rigors of live performances and studio sessions. Weighing in at a manageable size, it easily fits into pedalboards or gig bags, making it a practical addition to any setup. The TU-3 also includes a convenient battery operation option, offering extended use without the need for a power source. This combination of strength and portability ensures the tuner remains reliable and accessible, whether you’re performing on stage or rehearsing at home. Its long-lasting battery life further enhances its portability, allowing musicians to focus on their craft without interruptions.

How to Use the Boss TU-3 Chromatic Tuner

Plug in your instrument, press the pedal to activate. Use the bright display to guide tuning. Ensure accurate pitch with the TU-3’s reliable meter and intuitive interface.

3.1 Connecting Your Instrument

To connect your instrument to the Boss TU-3 Chromatic Tuner, start by plugging your guitar or bass into the INPUT jack. This action automatically powers on the tuner. Ensure your cable is securely inserted to maintain a clear signal. For amplifiers or other effects pedals, connect them to the OUTPUT jack. Note that the output sound is muted when the tuner is active, allowing you to tune silently. Press the pedal switch to activate the tuner and begin the tuning process. Always use a high-quality mono or 1/4″ cable to prevent interference and ensure accurate tuning. Proper connection is essential for optimal performance and precise pitch detection.

3.2 Basic Tuning Steps

Once your instrument is connected, press the pedal switch to activate the tuner. The display will light up, indicating it’s ready for tuning. Play a string on your instrument, and the tuner will detect the pitch. The meter will light up on the left if the note is flat (too low) and on the right if it’s sharp (too high). Adjust your instrument’s tuning pegs until the meter centers, indicating the note is in tune; For precise tuning, use the chromatic mode, which covers all twelve semitones. If using a bass, the display will show the string number (e.g., Hi-C as C, Lo-B as b). Repeat this process for each string. Ensure the cable used is high-quality to avoid interference. Proper tuning is essential for clear sound and performance accuracy. Always double-check your tuning before playing to ensure optimal results.

3.3 Switching Between Tuning Modes

To switch between tuning modes on the Boss TU-3, press the MODE button located on the pedal. Each press cycles through the available modes, including chromatic, guitar, and bass tuning modes. The display will indicate the current mode, ensuring you know which tuning setting is active. For bass players, the tuner displays the string number (e.g., Hi-C as C, Lo-B as b), making it easy to tune accurately. The chromatic mode allows tuning to any of the twelve semitones in an octave, providing versatility for various musical needs. The meter lights will stream toward the center when the pitch is in tune, offering clear visual feedback. This feature-rich design ensures the TU-3 adapts to your instrument and playing style, delivering precise tuning every time. By mastering mode switching, you can optimize your tuning process for different instruments and musical scenarios.

Understanding the Boss TU-3 Chromatic Tuner Manual

The manual provides a comprehensive guide to mastering the TU-3’s features, including chromatic tuning, flat options, and bass string display. It offers detailed instructions for navigating modes and troubleshooting common issues efficiently.

4.1 Navigating the Manual

Navigating the Boss TU-3 Chromatic Tuner Manual is straightforward, thanks to its clear structure. The manual is divided into sections, starting with an introduction, followed by features, usage, and troubleshooting. Each section is labeled clearly, making it easy to find specific information. For example, the “Support by Product” section provides direct links to updates, drivers, and manuals. The table of contents at the beginning allows users to jump to relevant parts quickly. Key sections include “Using the Unit Safely” and “Important Notes,” which are essential for proper operation. The manual also includes detailed diagrams and explanations for features like the MODE button and flat tuning options. By following the manual’s logical flow, users can efficiently learn to operate the TU-3 and resolve any issues that arise. This organized approach ensures that musicians can make the most of their tuner’s capabilities.

4.2 Key Sections to Focus On

The Boss TU-3 Chromatic Tuner Manual contains several key sections that are crucial for understanding and optimizing the device. First, the “Support by Product” section provides direct access to updates, drivers, and additional resources. The “Using the Unit Safely” and “Important Notes” sections are essential for ensuring proper handling and maintenance. Additionally, the manual details the operation of the MODE button, which is vital for switching between tuning modes. The “Flat Tuning” and “Bass String Number Display” sections are particularly useful for musicians who require alternate tunings. Diagrams and explanations of the tuner’s features, such as the high-brightness display and durable design, are also highlighted. Focusing on these sections ensures users can fully utilize the TU-3’s capabilities, from basic tuning to advanced customization. This structured approach helps musicians master the tuner efficiently and effectively.

Customization and Advanced Features

The Boss TU-3 offers flat tuning options (b, 2, 3) and bass string number display (Hi-C as C, Lo-B as b). Advanced features include switching modes via the MODE button.

5.1 Flat Tuning Options

The Boss TU-3 Chromatic Tuner offers versatile flat tuning options, allowing musicians to tune their instruments one, two, or three semitones lower. This feature is particularly useful for bass players or those experimenting with alternate tunings. The tuner displays these options as b (one semitone), 2 (two semitones), or 3 (three semitones). When in flat tuning mode, the bass string number is shown as C for Hi-C and b for Lo-B, ensuring clarity and precision. To access flat tuning, press the MODE button and cycle through the options until the desired flat setting appears on the display. The TU-3’s bright meter will guide you to the correct pitch, making it easy to achieve accurate tuning even in low-light environments. This feature enhances flexibility for various musical styles and setups, catering to both professional and hobbyist musicians alike.

5.2 Bass String Number Display

The Boss TU-3 Chromatic Tuner features a convenient bass string number display, designed to simplify tuning for bass players. When in bass tuning mode, the tuner displays the string number as C for Hi-C and b for Lo-B, ensuring clear identification of each string. This feature is particularly useful for musicians who frequently switch between standard and alternate tunings. The display provides immediate visual feedback, allowing for quick and accurate tuning. Additionally, the bass string number display works seamlessly with the flat tuning options, showing the correct string number even when tuning one, two, or three semitones lower. This functionality enhances the tuner’s versatility, making it a reliable tool for both bassists and guitarists. The clear and intuitive interface ensures that users can focus on their performance without unnecessary complexity.

Troubleshooting Common Issues

Address accuracy problems by ensuring proper input connection and calibration. Regularly clean the pedal and check battery life. Refer to the manual for detailed maintenance and error resolution guidance.

6.1 Resolving Accuracy Problems

Accuracy issues with the Boss TU-3 can often be resolved by ensuring proper connections and calibration. First, check that your instrument is connected correctly to the INPUT jack, as loose connections may cause inaccurate readings. Next, verify that the tuner is calibrated correctly for your instrument’s tuning range. If the meter does not center when playing the correct note, recalibrate the tuner by pressing and holding the MODE button while powering on. Additionally, low battery life or dirty sensors can affect performance, so replace batteries regularly and clean the pedal’s surface. For persistent issues, refer to the manual for advanced troubleshooting steps or reset the tuner to its factory settings. Proper maintenance and regular checks will ensure the TU-3 delivers precise tuning every time.

6.2 Maintenance Tips

Regular maintenance is crucial to ensure the Boss TU-3 Chromatic Tuner performs optimally. Start by cleaning the pedal regularly with a soft, dry cloth to remove dirt and grime that may interfere with its functionality. Avoid using harsh chemicals or abrasive materials, as they could damage the finish or harm the electronic components. Additionally, inspect the INPUT and OUTPUT jacks for dust or debris, which can affect signal quality. Use compressed air to gently clean these ports if necessary. Always handle the tuner with care to prevent physical damage, and avoid exposing it to extreme temperatures or moisture. For battery-powered use, ensure the compartment is clean and free of corrosion. Store the TU-3 in a protective case when not in use to safeguard it during transport. By following these maintenance tips, you can extend the lifespan of your tuner and maintain its accuracy and reliability.

Accessories and Compatibility

The Boss TU-3 is compatible with guitars and basses, offering precise tuning. Recommended accessories include the BOSS BCK-2 cable and BIC-10 patch cable for reliable connectivity and enhanced performance.

7.1 Recommended Accessories

To enhance your experience with the Boss TU-3 Chromatic Tuner, consider these recommended accessories:

  • BOSS BCK-2 Cable: Ensures reliable connectivity between your instrument and the tuner.
  • BOSS BIC-10 Patch Cable: Ideal for pedalboard setups, maintaining signal integrity.
  • 9V Battery or AC Adapter: Provides stable power for consistent performance.
  • High-Quality Guitar Cable: Minimizes interference and ensures clear signal transmission.
  • Carrying Case: Protects the tuner during transport, keeping it in pristine condition.

These accessories ensure optimal functionality and longevity of your Boss TU-3 Chromatic Tuner.

7.2 Compatibility with Guitars and Basses

The Boss TU-3 Chromatic Tuner is designed to work seamlessly with both guitars and basses, making it a versatile tool for musicians. It supports standard tuning for electric and acoustic guitars, as well as drop tunings commonly used in modern music. For bass players, the TU-3 offers a bass mode that displays string numbers, such as Hi-C (C) and Lo-B (b), ensuring accurate tuning. The tuner also accommodates flat tuning options, allowing bassists to tune one, two, or three semitones lower. Its wide tuning range (C0 to C8) covers the lowest bass frequencies and highest guitar notes. Whether you’re a guitarist or bassist, the TU-3 provides precise tuning and adaptability to meet your needs. This compatibility makes it an essential accessory for any musician seeking reliable tuning across multiple instruments.

Comparisons with Other Boss Tuner Models

The Boss TU-3 stands out as an evolution of the TU-2, offering enhanced accuracy and a brighter display. It also differs from the TU-3S, which includes buffered bypass and additional features for professional use.

8.1 Boss TU-2 vs. TU-3

The Boss TU-3 is the successor to the popular TU-2, offering several improvements. The TU-3 features a brighter display, making it easier to read on stage, and a higher accuracy for precise tuning. It also includes a “high-brightness” mode for better visibility under harsh lighting conditions. Additionally, the TU-3 introduces a new “Accu-Pitch” function, which provides visual feedback when the pitch is correct. While the TU-2 remains a reliable choice, the TU-3 enhances functionality with its advanced features. Both models share the same durable design and chromatic tuning capability, but the TU-3 is preferred by professionals for its improved performance. The TU-3 also maintains the same user-friendly interface as its predecessor, ensuring a smooth transition for musicians upgrading from the TU-2. Overall, the TU-3 represents a significant upgrade, making it a top choice for discerning players seeking superior accuracy and visibility.

8.2 Boss TU-3 vs. TU-3S

The Boss TU-3S is an enhanced version of the TU-3, offering additional features for advanced users. One key difference is the TU-3S’s silent tuning mode, which mutes the output signal during tuning, ensuring uninterrupted performances. The TU-3S also includes a true bypass and buffered bypass option, providing flexibility for pedalboard setups. Both models share the same chromatic tuning capability, high accuracy, and bright display, but the TU-3S adds a “flat tuning” option for bass players, allowing tuning one to three semitones lower. The TU-3S also features a more robust design and extended battery life. While the TU-3 remains a reliable choice for most musicians, the TU-3S is ideal for professionals seeking advanced functionality and silent operation. The TU-3S retains the user-friendly interface of the TU-3, making it easy to transition for those familiar with the original model.

User Reviews and Testimonials

Professional musicians praise the Boss TU-3 for its accuracy and durability. Many highlight its bright display and ease of use. A video review calls it “built like a tank” and “accurate enough to make your guitar cry in tune,” while another user notes its reliability for live performances. The TU-3 is widely regarded as a top choice for both guitarists and bassists, with many considering it an essential tool for maintaining perfect pitch. Its portability and robust design make it a favorite among touring artists. Overall, the TU-3 consistently receives high marks for its performance and reliability in professional settings.

9.1 Feedback from Professional Musicians

Professional musicians widely acclaim the Boss TU-3 Chromatic Tuner for its exceptional accuracy and reliability. Many artists highlight its durability, making it a trusted companion for live performances and studio sessions. A video review describes it as “built like a tank” and praises its bright display, which is visible even under harsh stage lighting. Guitarists and bassists alike appreciate its versatility, with one user noting its ability to handle both standard and alternate tunings seamlessly. The TU-3’s portability and robust design are particularly favored by touring musicians, who rely on its consistency in varying environments. Overall, the TU-3 is celebrated as a top-tier tuner that delivers precise results, earning it a spot in the rigs of professionals worldwide. Its reputation as a reliable and accurate tool solidifies its place as an essential piece of gear for musicians at all levels.

9.2 Where to Find User Reviews

Discovering user reviews for the Boss TU-3 Chromatic Tuner is straightforward, with numerous online platforms offering insights from musicians. The official Boss TU-3 Manual and support pages provide detailed product information, while forums like Guitar World and MusicRadar feature extensive user feedback. YouTube is another valuable resource, with unboxing videos, setup guides, and in-depth reviews showcasing the tuner’s performance. Additionally, music gear retailers such as Sweetwater and Musician’s Friend host customer reviews, offering real-world perspectives on the TU-3’s accuracy, durability, and ease of use. These reviews highlight the tuner’s reliability and versatility, making them an invaluable resource for musicians considering the Boss TU-3. By exploring these sources, users can gain a comprehensive understanding of the tuner’s capabilities and how it meets their specific needs.

The Boss TU-3 Chromatic Tuner Manual offers a comprehensive guide to mastering this versatile tool. Its accuracy, durability, and ease of use make it a reliable choice for musicians. Explore further to maximize its potential.

10.1 Final Thoughts on the Boss TU-3 Manual

The Boss TU-3 Chromatic Tuner Manual is an indispensable resource for musicians seeking to optimize their tuning experience. It provides clear, step-by-step instructions for navigating the tuner’s features, from basic tuning to advanced customization options like flat tuning and bass string display. The manual also offers troubleshooting tips to address common issues, ensuring uninterrupted use. By following the guide, users can fully utilize the TU-3’s chromatic tuning capability, high accuracy, and durable design. Whether you’re a professional musician or a beginner, this manual empowers you to achieve precise tuning effortlessly. Its comprehensive coverage makes it a valuable companion for anyone looking to get the most out of their Boss TU-3 Chromatic Tuner.

10.2 Encouragement to Explore Further

Exploring the Boss TU-3 Chromatic Tuner Manual is just the beginning of your journey to mastering precise tuning. With its wealth of information, the manual invites you to delve deeper into the tuner’s capabilities, such as chromatic tuning, flat tuning options, and bass string display. By experimenting with these features, you can tailor your tuning experience to suit your musical style and preferences. Additionally, online resources like tutorials and user forums offer further insights and tips for getting the most out of your TU-3. Encourage yourself to explore these avenues to enhance your understanding and skills. The more you discover, the more you’ll appreciate the versatility and accuracy of the Boss TU-3, making it an indispensable tool for your musical endeavors.

Open post

schumacher 800 amp jump starter manual

Welcome to the Schumacher 800 Amp Jump Starter Manual, your comprehensive guide to safe and effective use of this powerful portable jump starter. Designed for emergency situations, this unit delivers 800 peak amps, ideal for vehicles with engines up to 6 cylinders. This manual provides detailed instructions, safety precautions, and troubleshooting tips to ensure optimal performance and longevity of your device.

1.1 Overview of the Schumacher 800 Amp Jump Starter

The Schumacher 800 Amp Jump Starter is a portable, high-performance device designed to jump-start vehicles with engines up to 6 cylinders. With 800 peak amps of power, it reliably starts dead batteries in seconds. Its compact design and lightweight construction make it easy to carry and store. The unit includes essential features such as a DC socket with overload protection, an LED light for visibility, and a USB power bank for charging devices. Built-in safety protections ensure safe operation, while the automatic circuit breaker resets easily if overloaded. This versatile tool is perfect for emergency situations, providing a reliable solution for drivers and vehicle owners alike.

1.2 Importance of Reading the Manual

Reading the Schumacher 800 Amp Jump Starter Manual is crucial for safe and effective use. It provides essential safety guidelines, operating instructions, and troubleshooting tips to ensure proper functionality. The manual outlines key features, technical specifications, and maintenance requirements, helping users understand the device’s capabilities and limitations. By following the instructions, users can avoid potential hazards, such as incorrect connections or overload situations. Additionally, the manual covers warranty information and customer support details, ensuring users know how to address issues or seek assistance. Familiarizing yourself with the manual is vital to maximize the product’s performance and longevity while minimizing risks of damage or injury.

Key Features of the Schumacher 800 Amp Jump Starter

The Schumacher 800 Amp Jump Starter offers 800 peak amps for reliable jump-starting, portable design, overload protection, LED light, USB power bank, and a 30-amp DC socket.

2.1 Technical Specifications

The Schumacher 800 Amp Jump Starter delivers 800 peak amps, suitable for jump-starting vehicles with engines up to 6 cylinders. It operates on a 12V system, featuring a 30-amp DC socket with automatic overload protection. The unit includes a USB power bank for charging small devices and an LED light for visibility in low-light conditions. Designed for portability, it weighs just 12.5 pounds, making it easy to carry. The jump starter also includes a 12-foot cable and heavy-duty clamps for reliable connections. With its robust design and advanced safety features, this device ensures efficient and safe jump-starting in emergency situations.

2.2 Design and Portability

The Schumacher 800 Amp Jump Starter is built with a compact and lightweight design, weighing just 12.5 pounds, making it easy to carry in vehicles or store in limited spaces. Its durable plastic casing ensures resilience against impacts and harsh environments. The unit features an ergonomic handle for comfortable transport and is equipped with 12-foot heavy-duty cables, providing ample reach for connections. Additionally, the jump starter includes a built-in LED light for illumination in dark settings, enhancing usability during nighttime or low-light emergencies. These design elements combine to create a portable and user-friendly solution for jump-starting vehicles on the go.

2.3 Built-in Safety Protections

The Schumacher 800 Amp Jump Starter is equipped with multiple safety features to ensure safe and reliable operation. It includes overload protection, which prevents damage from excessive current, and short-circuit prevention to safeguard against improper connections. The unit also features reverse polarity protection, alerting users if cables are connected incorrectly. Additionally, thermal protection shuts down the device if it overheats, preventing potential damage. These built-in safety measures help protect both the jump starter and the vehicle’s electrical system. The automatic circuit breaker resets after a cooldown, ensuring continuous functionality. Always follow safety guidelines to maximize protection and efficiency during use.

Safety Precautions and Warnings

Always read and follow safety guidelines to prevent accidents. Ensure proper use of cables and avoid hazards like short circuits or overheating. Follow overload protection instructions.

3.1 General Safety Guidelines

Always ensure the vehicle ignition is turned off before connecting the jump starter. Keep the area clear of flammable materials and avoid short circuits by not touching cable clamps to metal parts. Inspect the jump starter for damage before use and ensure proper connection to avoid overheating. Never exceed the recommended battery capacity or operate near open flames. Wear protective gloves and eyewear for added safety. Store the device in a dry, cool place, away from children. Regularly check cables and terminals for wear. Follow all instructions carefully to prevent accidents and ensure safe operation. If unsure, consult the manual or seek professional assistance.

3.2 Precautions Before Use

Before using the Schumacher 800 Amp Jump Starter, read the manual thoroughly and ensure the device is free from damage. Always inspect the cables and terminals for wear or corrosion. Ensure the vehicle is parked on a level surface and the ignition is turned off. Never connect the jump starter to a damaged or frozen battery, as this can cause explosions. Avoid overloading the circuit by connecting additional accessories. Keep the area clear of flammable materials and ensure the device is not exposed to extreme temperatures. Properly test the jump starter before use to ensure it is fully charged and functioning correctly. Failure to follow these precautions may result in injury or damage.

3.3 Emergency Procedures

In case of an emergency while using the Schumacher 800 Amp Jump Starter, follow these steps: If sparks or smoke appear, immediately disconnect the cables and turn off the device. If the jump starter overheats, stop use and allow it to cool. Never touch electrical components with wet hands or in damp conditions. If the circuit breaker trips, press the reset button located on the back of the unit. Always ensure proper ventilation to avoid inhaling harmful fumes. For severe issues, consult the manual or contact Schumacher customer support. Prioritize safety and avoid risky operations to prevent accidents or further damage to the equipment.

Operating Instructions for the Schumacher 800 Amp Jump Starter

Turn the ignition off, lay DC cables away from moving parts, and press the Light/USB Power and Jump Start buttons for 5 seconds to activate the device safely.

4.1 Step-by-Step Usage Guide

Ensure the vehicle’s ignition is turned off and all accessories are disconnected. 2. Locate the dead battery and attach the positive (red) clamp to the positive terminal. 3. Connect the negative (black) clamp to a metal ground on the vehicle. 4. Press and hold the Light/USB Power and Jump Start buttons for 5 seconds to activate the jump starter. 5. Start the vehicle’s engine and allow it to run for a few minutes. 6. Remove the clamps in the reverse order of attachment. Always follow safety guidelines and consult the manual for complex situations.

4.2 Connecting the Jump Starter to the Battery

Ensure the vehicle’s ignition is turned off and all accessories are powered down. 2. Identify the dead battery’s positive (+) and negative (-) terminals. 3. Attach the positive (red) clamp to the positive terminal, ensuring a secure connection. 4. Connect the negative (black) clamp to a solid metal ground, avoiding moving parts. 5; Check for a green light on the jump starter, indicating proper connection. 6. Avoid touching metal parts to prevent short circuits. If the DC socket has a 30-amp automatic overload protection circuit, ensure it is reset if tripped. Always follow safety guidelines to prevent damage or injury.

4.3 Starting the Vehicle

Turn the ignition key to the “ON” position but do not start the engine yet. Press the jump starter’s power button to activate it. Start the vehicle’s engine and allow it to run for a few minutes to recharge the battery. Remove the clamps in the reverse order: negative first, then positive. Store the jump starter safely after use. Always ensure the area is clear of flammable materials and avoid sparks. If unsure, consult the manual for specific instructions.

Key Components of the Schumacher 800 Amp Jump Starter

The Schumacher 800 Amp Jump Starter features a robust battery, heavy-duty clamps, a DC socket with overload protection, an LED light for visibility, and a durable, portable design.

5.1 DC Socket and Overload Protection

The Schumacher 800 Amp Jump Starter is equipped with a DC socket that provides a secure connection for various accessories. It features a 30-amp automatic overload protection circuit breaker, designed to prevent electrical overloads by interrupting the current flow if it exceeds safe levels. This safety feature ensures that both the jump starter and connected devices are protected from potential damage. In case of an overload, the breaker can be easily reset by pressing the button located on the back of the unit. This combination of functionality and safety makes the DC socket a versatile and reliable component for diverse applications.

5.2 LED Light and USB Power Bank

The Schumacher 800 Amp Jump Starter features a built-in LED light, providing reliable illumination for low-light situations. This bright light can function in both steady and flashing modes, making it ideal for emergency signaling or navigating dark environments while jump-starting a vehicle. Additionally, the unit includes a USB power bank, allowing you to charge smartphones, tablets, or other portable devices on the go. The USB port ensures compatibility with a wide range of electronic gadgets, making it a versatile tool for everyday use and emergencies. The combination of an LED light and USB power bank enhances convenience and functionality, ensuring you stay connected and visible in any situation;

5.3 Battery and Charging System

The Schumacher 800 Amp Jump Starter is equipped with a high-capacity 12V battery, designed to deliver reliable power for jump-starting vehicles and charging external devices. The battery can be charged using the included wall charger or through a vehicle’s 12V outlet, ensuring convenience on the go. The charging system features an automatic shut-off to prevent overcharging, safeguarding the battery’s longevity. LED indicators on the unit provide visual feedback on the charging status, ensuring you always know when the battery is ready for use. The advanced charging system is built with safety in mind, offering protection against overcharge and short circuits to ensure safe and efficient operation.

Maintenance and Storage Tips

Regularly inspect and clean the unit, store it in a cool, dry place, and charge the battery every 3 to 6 months to maintain performance.

6.1 Storing the Jump Starter

Store the Schumacher 800 Amp Jump Starter in a cool, dry place, away from direct sunlight and moisture. Avoid extreme temperatures, as this can damage the battery. Ensure the unit is placed on a stable surface, away from flammable materials. Before storage, charge the battery to at least 50% capacity to prevent deep discharge. If storing for an extended period, recharge every 3 to 6 months to maintain battery health. Keep the jump starter away from children and pets. Always inspect the unit for damage before and after storage. Proper storage ensures longevity and reliable performance when needed.

6.2 Charging the Battery

Charge the Schumacher 800 Amp Jump Starter using the provided charger or a compatible 12V DC power source. Plug the charger into a wall outlet and connect it to the jump starter’s DC socket. The LED indicator will show charging progress, turning green when fully charged. Avoid overcharging by disconnecting the charger once the battery is full. If storing the unit for extended periods, recharge every 3 to 6 months to maintain battery health. Always follow the manual’s charging instructions to prevent damage. Ensure the charging area is well-ventilated and away from flammable materials. Proper charging ensures reliable performance when you need it most.

6.3 Cleaning and Inspection

Regularly clean the Schumacher 800 Amp Jump Starter to maintain performance and safety. Use a soft, dry cloth to wipe down the exterior, avoiding harsh chemicals or abrasive materials. For the terminals, apply a small amount of anti-corrosion spray or a baking soda and water solution to remove rust or grime. Inspect the cables for any signs of damage, such as frayed wires or loose connections. Check the DC socket and USB ports for dirt or debris, cleaning them gently with a cotton swab if necessary. Ensure all components are secure and functioning properly before storing or using the device. Regular inspections help prevent issues and extend the product’s lifespan.

Troubleshooting Common Issues

Identify common issues like battery failure or faulty connections. Check for loose clamps, damaged cables, or a tripped circuit breaker. Reset the breaker if necessary and ensure proper connections for reliable operation.

7.1 Diagnosing Battery Problems

Diagnosing battery issues with the Schumacher 800 Amp Jump Starter involves checking the battery’s charge level and connections. Ensure the battery terminals are clean and free from corrosion. If the jump starter fails to charge, verify the AC power source and charging cable integrity. A dead battery may require a full charge before use. If issues persist, consult the troubleshooting section for further guidance or reset the circuit breaker. Always refer to the manual for detailed diagnostic steps to resolve battery-related problems effectively and safely.

7.2 Resolving Connection Issues

Connection issues with the Schumacher 800 Amp Jump Starter can often be resolved by ensuring proper cable attachments. Verify that the clamps are securely connected to the correct terminals—red to positive (+) and black to negative (-)—and not touching any moving parts. Check cables for damage or wear; replace them if necessary. If the jump starter fails to detect a connection, restart the device or reset the circuit breaker. Clean the terminals and clamps with a wire brush to maintain good conductivity. Always follow the manual’s guidelines for safe and effective connections to avoid potential hazards and ensure reliable performance.

7.3 Resetting the Circuit Breaker

Resetting the circuit breaker on your Schumacher 800 Amp Jump Starter is a simple process. Locate the circuit breaker button on the back of the unit. Press and hold the button until you hear a click, indicating the breaker has reset. This step is necessary if the device overload protection activates. Ensure the jump starter is disconnected from any power source before resetting. After resetting, reconnect the device and test its functionality. Always follow safety guidelines to avoid electrical hazards. If issues persist, consult the manual or contact customer support for further assistance. Regular maintenance ensures optimal performance and safety.

Warranty and Customer Support

Schumacher Electric Corporation warrants your unit to be free from defects. For assistance, call 1-800-621-5485 or visit www.schumacher.com.

8.1 Warranty Policy

The Schumacher 800 Amp Jump Starter is backed by a warranty from Schumacher Electric Corporation, ensuring it is free from defects in material and workmanship. The warranty period varies depending on the product and is outlined in the manual. Customers can rely on this coverage for repairs or replacements if issues arise within the specified timeframe. For detailed warranty terms, refer to the manual or contact customer service.

8.2 Contacting Schumacher Customer Service

For any inquiries or assistance with the Schumacher 800 Amp Jump Starter, customers can contact Schumacher Electric Corporation’s customer service team. They are available at 1-800-621-5485 during business hours, 7 AM to 4 PM CST. Additionally, you can visit their official website at www.schumacher.com for support resources, including downloadable manuals, troubleshooting guides, and warranty information. The customer service team is dedicated to providing prompt and helpful assistance to ensure your experience with the product is positive and hassle-free.

8.3 Accessing Online Resources

For convenient access to additional support, visit the official Schumacher Electric website at www.schumacher.com. Here, you can download the complete manual for the 800 Amp Jump Starter, as well as explore troubleshooting guides, warranty details, and FAQs. The website also offers resources for product registration, firmware updates, and accessory information. Additionally, you can find instructional videos and user guides to enhance your understanding of the product. Online resources are regularly updated to ensure you have the latest information for optimal performance and safety. Utilize these tools to maximize the functionality of your Schumacher 800 Amp Jump Starter and resolve any issues efficiently.

Additional Tips for Effective Use

Use the Schumacher 800 Amp Jump Starter in extreme weather conditions with caution. Adapt it for different vehicle types, ensuring compatibility. Follow best practices for long-term reliability and performance.

9.1 Using the Jump Starter in Extreme Weather

When using the Schumacher 800 Amp Jump Starter in extreme weather, exercise caution to ensure safety and effectiveness. In cold conditions, allow the battery to warm up slightly before use, as frigid temperatures can reduce performance. In hot weather, avoid direct sunlight exposure to prevent overheating. Always inspect cables for damage or wear, especially in harsh environments. For optimal results, store the jump starter in a cool, dry place when not in use. Follow the manual’s guidelines for extreme weather operations to maintain reliability and extend the product’s lifespan.

  • Avoid using in temperatures below -20°F or above 120°F.
  • Keep the device dry to prevent electrical hazards.
  • Store properly after use to maintain performance.

9.2 Jump-Starting Different Vehicle Types

The Schumacher 800 Amp Jump Starter is versatile, supporting various vehicles. It efficiently jump-starts cars, trucks, and SUVs with engines up to 6 cylinders, ensuring reliable performance across different vehicle types. For larger vehicles like diesel trucks, ensure the battery capacity matches the starter’s power. Always refer to your vehicle’s manual for specific requirements. When jump-starting motorcycles or smaller engines, use the appropriate setting to avoid damage. The unit’s portability and adjustable features make it suitable for a wide range of applications, from compact cars to heavy-duty trucks.

  • Ideal for cars, trucks, and SUVs with up to 6-cylinder engines.
  • Suitable for motorcycles and smaller engine vehicles with caution.
  • Adjust settings for larger vehicles like diesel trucks.

9.3 Best Practices for Long-Term Use

To ensure long-term reliability, store the Schumacher 800 Amp Jump Starter in a cool, dry place, away from direct sunlight. Regularly charge the battery to maintain its health, even during periods of inactivity. Avoid extreme temperatures and keep the unit clean from dust and debris. Inspect the cables and clamps for damage before each use and replace them if necessary. Do not overcharge the battery, as this can reduce its lifespan. Always follow the manufacturer’s charging guidelines and safety precautions. By adhering to these practices, you can extend the life of your jump starter and ensure it remains ready for emergencies.

  • Store in a cool, dry environment.
  • Charge regularly, even when not in use.
  • Inspect cables and clamps for damage.
  • Avoid overcharging the battery.

This concludes the Schumacher 800 Amp Jump Starter Manual. By following the guidelines, users can ensure safe, effective, and long-term use of their device.

10.1 Summary of Key Points

The Schumacher 800 Amp Jump Starter Manual provides essential guidance for safe and effective use of the device. It emphasizes proper connection procedures, safety precautions, and troubleshooting tips. The manual highlights the unit’s portability and 800 peak amp capacity, suitable for most vehicles. Key sections include safety guidelines, operating instructions, and maintenance tips to ensure longevity. Users are reminded to follow all precautions to avoid electrical hazards and ensure successful jump-starting. By adhering to the manual’s instructions, users can maximize the device’s performance and reliability in emergency situations.

10.2 Final Safety Reminders

Always prioritize safety when using the Schumacher 800 Amp Jump Starter. Ensure the vehicle’s ignition is off and keep cables away from moving parts. Never touch electrical components with wet hands or in damp conditions. Regularly inspect the unit and cables for damage. Store the jump starter in a cool, dry place, away from children. Follow overload protection guidelines to prevent damage. If unsure about any procedure, consult the manual or contact customer support. Remember, improper use can lead to electrical hazards or device malfunction. By adhering to these reminders, you ensure safe and effective operation of your Schumacher 800 Amp Jump Starter.

Open post

simpson pressure washer owners manual

Welcome to the Simpson Pressure Washer manual. This guide provides essential information for safe and effective use, covering setup, operation, and maintenance. Read carefully for optimal performance and safety.

Purpose of the Manual

This manual is designed to provide comprehensive guidance for the safe and effective use of your Simpson pressure washer. It covers essential information, including setup, operation, maintenance, and troubleshooting. The purpose is to ensure users understand the product’s capabilities, limitations, and proper handling to maximize performance and longevity. By following the instructions, you can achieve optimal cleaning results while minimizing risks. This guide is intended for both new and experienced users, serving as a reference for mastering the pressure washer’s functions. It emphasizes safety, proper techniques, and routine care to help you get the most out of your investment. Always refer to this manual before operating the pressure washer to ensure safe and efficient use.

Key Features of the Simpson Pressure Washer

Your Simpson pressure washer is equipped with powerful features designed for efficient cleaning. It boasts high PSI and GPM ratings, ensuring strong cleaning power for tough tasks. The durable construction includes a robust frame and long-lasting components. The pressure washer features an easy-to-use interface with adjustable nozzles for various cleaning needs. It also includes safety features like automatic shut-off and thermal protection. The compact design allows for easy mobility and storage. With its versatile capabilities, the Simpson pressure washer is ideal for cleaning driveways, decks, vehicles, and more. These features combine to deliver a reliable and high-performance cleaning experience, making it a valuable tool for both residential and light commercial use.

Important Safety Information

Warning: Always read and follow the instructions in this manual before operating your Simpson pressure washer. Wear protective gear, including goggles and closed-toe shoes, to prevent injury. Keep children and pets away while operating the unit. Never aim the nozzle at people, animals, or electrical components. Avoid using the pressure washer near open flames or sparks, and ensure the area is well-ventilated. Do not use the washer in enclosed spaces without proper ventilation. Be cautious of high-pressure streams, which can cause lacerations. Use only approved nozzles and accessories to avoid damage or malfunction. Regularly inspect hoses and connections for wear or damage. Failure to follow safety guidelines may result in serious injury or equipment damage.

Safety Guidelines and Precautions

Adhere to safety guidelines to prevent accidents. Always wear protective gear, avoid aiming nozzles at people or electrical components, and ensure proper ventilation. Regularly inspect equipment for damage.

General Safety Precautions

Always prioritize safety when operating the Simpson pressure washer. Wear protective eyewear, gloves, and closed-toe shoes to prevent injury from debris or high-pressure streams. Ensure the area is clear of bystanders, especially children and pets. Never aim the nozzle at people, animals, or electrical components. Keep the pressure washer on a stable, level surface to avoid tipping. Use the correct nozzle for the task to maintain control and avoid accidental spray. Regularly inspect hoses and connections for damage or leaks. Avoid using the pressure washer in wet conditions or while standing on unstable ground. Keep the unit away from open flames or sparks. Always follow the manufacturer’s instructions for assembly, operation, and maintenance to ensure safe and effective use.

Specific Warnings and Cautions

Never cover the pressure washer during operation to avoid overheating. Avoid touching or blocking the nozzle’s pinhole, as it can cause serious injury. Do not modify or alter the equipment, as this may void the warranty and create safety hazards. Always follow the engine manufacturer’s instructions for gas-powered models. Never use the pressure washer near open flames or sparks, as it may ignite flammable materials. Avoid spraying delicate surfaces like glass or soft materials, as high pressure can cause damage. Do not operate the unit in wet conditions or while standing on an unstable surface. Keep children and pets away during operation. Never use damaged or worn-out nozzles, as they can malfunction and cause accidents. Always turn off the engine and allow it to cool before performing maintenance or repairs. Unauthorized repairs may lead to malfunctions or safety risks.

Protective Equipment Recommendations

To ensure safe operation, always wear appropriate protective gear. Safety glasses or goggles are essential to protect your eyes from debris and high-pressure spray. Wear durable gloves to maintain a firm grip on the spray gun and prevent slipping. Closed-toe footwear is recommended to protect feet from heavy objects or accidental spray. Avoid loose clothing that could get caught in moving parts. Hearing protection, such as earplugs, is advised due to the loud engine noise. Keep long hair tied back to avoid entanglement. Ensure all protective equipment is in good condition and suitable for the task at hand. Proper gear reduces the risk of injury and enhances control while operating the pressure washer;

Initial Setup and Assembly

Begin by carefully unboxing and inspecting the pressure washer for damage. Attach the hose and nozzle securely, ensuring all connections are tight. Prepare the engine or motor according to the manual’s instructions. Always refer to the detailed assembly guide provided for specific steps and precautions to ensure proper setup and functionality.

Unboxing and Inspecting the Pressure Washer

Begin by carefully unboxing the pressure washer and inspecting all components for damage or wear. Check the hose, nozzle, and engine or motor for any signs of shipping damage. Ensure all parts, including the gun, wand, and detergent tank, are included and undamaged. Refer to the parts list in the manual to verify completeness. Inspect the hose for kinks or abrasions and ensure all connections are secure. If any damage is found, contact customer support immediately. This step ensures your pressure washer is ready for safe assembly and operation. Always follow the manual’s guidance for proper inspection and handling of components.

Attaching the Hose and Nozzle

Attach the high-pressure hose to the pump and gun securely, ensuring all connections are tight. Use Teflon tape on threaded fittings for a leak-free seal. Next, connect the spray nozzle to the wand, ensuring it clicks into place. For different cleaning tasks, select the appropriate nozzle tip and attach it firmly. Always refer to the manual for specific torque values to avoid over-tightening, which could damage threads. Properly secured connections are crucial for safe operation and optimal performance. If unsure, consult the manual or contact support for guidance. This step ensures your pressure washer is assembled correctly and ready for use.

Preparing the Engine or Motor

Before first use, ensure the engine or motor is properly prepared. For gas-powered models, check the oil level and fill with the recommended oil type, as specified in the manual. Ensure the fuel tank is filled with fresh, unleaded gasoline. For electric models, verify all electrical connections are secure and the power cord is undamaged. Always refer to the engine or motor section of the manual for specific instructions. Check for any loose belts or connections and tighten as needed. Prime the engine if required, following the manufacturer’s guidelines. Ensure the area is well-ventilated and clear of flammable materials. Proper preparation ensures smooth operation and extends the lifespan of your pressure washer. Follow all safety precautions to avoid accidental start-ups or injuries.

Operating the Pressure Washer

Start the engine or motor, adjust the spray nozzle, and use the correct techniques for effective cleaning. Always follow safety guidelines and manufacturer instructions for optimal performance.

Starting the Engine or Motor

To start the engine or motor of your Simpson pressure washer, ensure the unit is on a level surface and all safety precautions are in place. For gas-powered models, check the fuel and oil levels, ensuring they are at the recommended levels. Pull the choke (if applicable) and grasp the starter handle firmly. Pull the handle in one swift motion until the engine roars to life. For electric models, plug in the unit, ensure the power switch is in the “off” position, then turn it on. Always refer to the specific instructions in your manual for detailed starting procedures. Wearing protective gear, such as gloves and safety glasses, is highly recommended during startup.

Using the Spray Nozzle and Adjusting Pressure

Using the spray nozzle and adjusting pressure on your Simpson pressure washer is crucial for effective cleaning. Begin by selecting the appropriate nozzle tip for your task, as different tips provide varying spray angles and pressures. Attach the nozzle securely to the wand to ensure proper operation. To adjust pressure, use the regulator on the unit, turning it clockwise to increase pressure and counterclockwise to decrease it. Always start with a lower pressure setting and gradually increase as needed. Monitor the pressure gauge to avoid exceeding recommended levels. For optimal results, maintain a consistent distance from the surface being cleaned and keep the nozzle moving to prevent damage. Refer to your manual for specific pressure recommendations for different surfaces.

Basic Cleaning Techniques

Start by selecting the right nozzle tip for the job, ensuring it’s securely attached to the wand. Begin cleaning at a low pressure setting, gradually increasing as needed. Maintain a consistent distance from the surface, typically 12-24 inches, to avoid damage. Use broad, sweeping motions, keeping the nozzle moving to prevent concentrated pressure on one spot. For general cleaning, a wide fan tip is ideal, while a narrow tip is better for tough stains. Divide large areas into sections for even cleaning. Avoid using the pressure washer at an angle or tilting it upward, as this can reduce effectiveness. For delicate surfaces, use a low-pressure setting and a wide nozzle. Always test a small area first to ensure the pressure won’t damage the material. Refer to your manual for surface-specific cleaning recommendations.

Maintenance and Upkeep

Regularly clean the machine, inspect hoses for damage, and check oil levels. Store the pressure washer in a dry, protected area during off-seasons. Winterize properly for freezing temperatures.

Regular Cleaning and Inspection

Regular cleaning and inspection are crucial for maintaining your Simpson pressure washer’s performance and longevity. Start by wiping down the exterior with a soft cloth to remove dirt and debris. Check hoses and connections for signs of wear, cracks, or leaks. Lubricate moving parts, such as the spray wand and nozzle, to ensure smooth operation. Drain and flush the pump after each use to prevent mineral buildup. Inspect the filter and clean or replace it as needed. Regularly check the oil level in gas-powered models and top it off if necessary. Always refer to the manual for specific cleaning solutions and lubricants recommended by the manufacturer. A well-maintained pressure washer will deliver consistent results and reduce the risk of costly repairs.

Storing the Pressure Washer

Proper storage of your Simpson pressure washer is essential to maintain its performance and longevity. After use, drain the pump and hoses to prevent water from freezing or causing damage. Store the unit in a dry, well-ventilated area, away from direct sunlight and extreme temperatures. Avoid leaving the pressure washer outdoors during winter months, as cold weather can damage components. Secure loose parts, such as hoses and nozzles, to prevent loss or damage. Before storing, inspect the equipment for any signs of wear or damage and address them promptly. Always refer to the manual for specific storage recommendations tailored to your model. Proper storage ensures your pressure washer remains in optimal condition for future use.

Winterization Tips

Winterizing your Simpson pressure washer is crucial to protect it from cold-weather damage. Start by draining all water from the pump, hoses, and spray gun to prevent freezing. Use a pump saver or RV antifreeze rated for pressure washers to protect internal components. For gas-powered models, stabilize the fuel by either draining the tank or adding a fuel stabilizer. Store the unit in a dry, insulated area away from direct exposure to cold temperatures. Cover the pressure washer to shield it from dust and pests. Before storage, inspect all parts for damage and address any issues promptly. Proper winterization ensures your pressure washer remains functional and ready for use when spring arrives.

Troubleshooting Common Issues

Identify and resolve common problems with your Simpson pressure washer. Check for issues like low pressure, engine malfunction, or hose kinks. Refer to the manual for guidance on diagnosing and fixing issues. Always follow safety protocols and seek professional help if problems persist. Regular maintenance can prevent many common issues. Keep this guide handy for quick solutions to ensure optimal performance and longevity of your pressure washer.

Engine or Motor Problems

Engine or motor issues are common and can often be resolved with basic troubleshooting. If the engine fails to start, check the fuel level, air filter, and spark plug. Ensure the choke is functioning properly and that there are no blockages in the fuel line. Overheating can cause the engine to shut down; allow it to cool before restarting; For electric motors, verify power supply and check for tripped circuit breakers. Low power output may indicate worn pistons or faulty valves. Regular oil changes and filter maintenance can prevent many issues. If problems persist, consult the manual or contact a certified technician. Always follow safety guidelines when handling engine repairs to avoid injury or further damage.

Low Pressure or Flow Issues

Low pressure or flow issues can hinder cleaning efficiency. Check for kinked or blocked hoses, which restrict water flow. Ensure the nozzle is clean and free from debris, as clogs can reduce pressure. Verify that the water supply is adequate, with a functioning inlet screen. A worn-out or damaged seal in the pump may also cause low pressure. Regularly inspect and replace worn components. If using an electric model, ensure the power supply meets the unit’s requirements. For gas models, check the fuel level and air filter. Consult the manual for specific troubleshooting steps or contact support if issues persist. Addressing these problems promptly will restore optimal performance and extend the life of your pressure washer;

Hose or Nozzle Malfunction

A malfunctioning hose or nozzle can disrupt cleaning tasks. Inspect the hose for kinks, twists, or damage, which can restrict water flow. Check for blockages in the nozzle orifice, often caused by dirt or debris. Clean the nozzle with a small brush or stiff wire to restore flow. If the hose is damaged, replace it with a compatible Simpson part. Ensure the nozzle is securely attached to the gun to maintain proper pressure. Regularly inspect O-rings and gaskets for wear, as leaks can reduce performance. Addressing these issues promptly will ensure consistent pressure and flow, optimizing your cleaning experience. Always refer to the manual for specific replacement procedures or contact support for assistance.

Warranty and Support Information

Your Simpson pressure washer is backed by a comprehensive warranty. For details, visit the official website or contact customer support. Troubleshooting guides are also available online.

Understanding the Warranty Coverage

Your Simpson pressure washer is protected by a comprehensive warranty program designed to ensure peace of mind. The warranty covers manufacturing defects in materials and workmanship for a specified period. For detailed terms and conditions, visit the official Simpson website or refer to the warranty section in this manual. Coverage typically includes repairs or replacements for faulty components, excluding wear and tear or misuse. To maintain warranty validity, follow all usage and maintenance guidelines outlined in this manual. For any warranty-related inquiries or claims, contact Simpson’s customer support team directly. Always keep your proof of purchase handy for warranty verification. Troubleshooting guides and repair options are also available online to help resolve common issues efficiently.

Contacting Customer Support

For assistance with your Simpson pressure washer, contact customer support directly via phone or email. Visit the official Simpson website for detailed contact information. Support is available to address inquiries, troubleshooting, and warranty claims. When reaching out, have your product model number and purchase date ready for faster service. Simpson’s team is dedicated to providing timely and effective solutions to ensure your pressure washer operates at peak performance. For urgent issues, phone support is recommended, while email is ideal for less critical matters. Additionally, online resources, including FAQs and user forums, offer helpful guidance and solutions to common problems. Regularly check the Simpson website for updates and new support materials to maximize your user experience.

Ordering Replacement Parts

To maintain your Simpson pressure washer’s performance, genuine replacement parts are essential. Visit the official Simpson website or authorized dealers to find the correct components for your model. Use the parts lookup tool on the website by entering your pressure washer’s model number, found in the owner’s manual or on the product label. Ensure accuracy by double-checking the model number before placing an order. For assistance, contact Simpson’s customer support team via phone or email. Purchasing from authorized sources guarantees authenticity and compatibility. Keep your pressure washer functioning optimally by using genuine Simpson parts, ensuring safety and reliability. Always verify part numbers and descriptions before finalizing your purchase to avoid delays or errors.

Additional Resources

Access online manuals, troubleshooting guides, and FAQs for your Simpson pressure washer. Visit the official website or community forums for tips and support from experienced users.

Online Manuals and Guides

Access comprehensive online manuals and guides for your Simpson pressure washer on the official website or platforms like ManualsLib. These resources provide detailed instructions, troubleshooting tips, and FAQs to help you master your equipment. Download PDF versions for offline use or refer to digital copies for quick access. Additionally, community forums and user-generated content offer valuable insights and solutions from experienced owners. Use these resources to resolve issues, learn maintenance tips, and optimize performance. Always ensure you’re referencing the correct model-specific manual for accurate information. These online tools are indispensable for keeping your pressure washer in top condition and addressing any challenges you may encounter during use.

FAQs and User Forums

Explore frequently asked questions and user forums for your Simpson pressure washer to find solutions to common issues and tips for optimal use. The official Simpson website and platforms like ManualsLib offer extensive FAQ sections covering topics like troubleshooting, maintenance, and operation. User forums provide valuable insights from experienced owners, sharing tips and solutions for specific models. These resources help address concerns such as low pressure, nozzle malfunctions, and winterization. Engage with the community to resolve issues quickly and improve your pressure washing experience. Additionally, customer support teams often monitor forums, offering expert advice. These platforms are a great way to connect with other users and ensure you get the most out of your Simpson pressure washer.

Final Tips for Optimal Performance

To ensure your Simpson Pressure Washer performs at its best, always follow the recommended maintenance schedule and store it properly after use. Regularly inspect hoses and nozzles for damage, and replace worn parts promptly. Use the correct nozzle for the job to avoid unnecessary wear on the equipment. For tough cleaning tasks, consider using a detergent specifically designed for pressure washers. Keep the water supply clean and free from debris to maintain consistent pressure. Finally, refer to the manual for specific guidance on winterization and long-term storage to extend the life of your pressure washer.

Encouragement to Follow Safety Guidelines

Following the safety guidelines in this manual is crucial for protecting yourself and others while using the Simpson Pressure Washer. Always wear protective gear, including gloves and safety glasses, to prevent injury from debris or spray. Keep children and pets away during operation, as the high-pressure spray can cause harm. Never touch hot surfaces or attempt to modify the equipment without proper knowledge. Regularly inspect hoses and connections for damage to avoid leaks or malfunctions. By adhering to these guidelines, you ensure a safe and effective cleaning experience. Remember, safety is your top priority when operating power equipment. Always consult the manual for specific precautions and best practices before starting your tasks.

Open post

manual for ge jgsp28 gas range

The GE JGSP28 is a 30-inch slide-in gas range with a self-cleaning oven, offering efficient cooking solutions for modern kitchens. Its sleek design and versatile features make it a practical choice for home cooking enthusiasts.

1.1 Product Overview

The GE JGSP28 is a 30-inch slide-in gas range designed for versatility and efficiency. It features a self-cleaning oven for effortless maintenance and a spacious cooking area. The range includes multiple burner sizes, allowing for precise heat control, and a large oven capacity to accommodate big meals. Its sleek design integrates seamlessly into modern kitchens, offering both functionality and style. The model is available in various finishes, ensuring it complements different decor styles. With its robust construction and user-friendly controls, the JGSP28 is ideal for home cooks seeking reliable performance. The owner’s manual provides detailed guidance on operation, while GE’s customer support ensures assistance is always available. This range is built to deliver consistent results, making it a practical choice for everyday cooking needs.

1.2 Key Features

The GE JGSP28 gas range boasts several standout features, including a self-cleaning oven that simplifies maintenance and a powerful burner system for versatile cooking. The range offers multiple burner sizes, allowing for precise heat control, from simmering sauces to high-heat searing. The oven features a large capacity, ideal for cooking multiple dishes simultaneously. Additional highlights include a convenient timer and clock for accurate meal preparation and a durable construction designed for long-lasting performance. The range also incorporates safety features, such as automatic ignition and heat distribution, ensuring reliable and efficient cooking experiences. These features make the JGSP28 a comprehensive and user-friendly appliance for modern kitchens, catering to both novice and experienced cooks.

Safety Instructions

Always read the manual thoroughly before using the GE JGSP28 gas range. Ensure proper ventilation and keep flammable materials away. Never leave cooking unattended, especially when children are nearby.

2.1 Important Safety Precautions

Always read the manual thoroughly before using the GE JGSP28 gas range. Ensure proper ventilation in your kitchen to avoid gas fumes buildup. Never leave cooking unattended, especially when children are present. Keep flammable materials, such as curtains or towels, away from the range. Avoid wearing loose clothing that could catch fire near open flames. Ensure pots and pans are properly placed on burners to prevent spills. Use oven mitts or tongs to handle hot cookware. Never heat empty cookware, as it may damage the range or cause accidents. Store the manual in an accessible location for quick reference. Always follow the manufacturer’s guidelines for safe operation.

2.2 Safe Handling and Usage

Proper handling and usage are essential for optimal performance and safety. Always ensure the range is installed by a qualified technician to meet safety standards. Use cookware of the correct size and type to prevent accidents. Never place flammable materials near open flames or hot surfaces. Keep children away while cooking, as they may accidentally touch hot surfaces. Regularly clean burners and drip pans to maintain efficiency and prevent grease fires. Avoid using abrasive cleaners, as they may damage the finish. Always attend to cooking; unattended food can lead to fires. Follow the manual for specific guidelines on burner and oven operation. For any concerns, contact GE customer support at 800.GE.CARES for assistance.

Installation and Setup

The GE JGSP28 requires professional installation to ensure compliance with safety standards. The range must be properly leveled and connected to a gas supply line.

3.1 Installation Requirements

Proper installation of the GE JGSP28 gas range is crucial for safe and efficient operation. Ensure a 30-inch space is allocated in your kitchen, with adequate ventilation. The range must be installed by a qualified technician to meet local building codes and safety standards. A gas supply line with a shut-off valve should be accessible nearby. The range should be placed on a level surface to ensure even cooking and prevent potential hazards. Additionally, the installation area must be free from flammable materials and have proper clearance from walls and other appliances. Always refer to the owner’s manual for detailed specifications and guidelines.

3.2 Initial Setup and Leveling

After installation, ensure the GE JGSP28 gas range is properly set up and leveled for optimal performance. Begin by carefully unpacking and placing the range in its designated area. Check that the surface is level using a spirit level. If necessary, adjust the range’s adjustable legs to achieve even balance. Ensure all connections, including gas and electrical, are secure and meet safety standards. Once leveled, verify that the oven door aligns properly and closes securely. For precise instructions, consult the owner’s manual. Proper leveling ensures even cooking, prevents spills, and maintains appliance stability. This step is crucial for both functionality and safety. Always follow the manufacturer’s guidelines for initial setup.

Operating the Range

The GE JGSP28 offers seamless cooking control with its gas burners, oven, and timer. Follow the manual’s guidelines for safe and efficient operation.

4.1 Using the Burners

To operate the burners on your GE JGSP28 gas range, ensure the burner caps and grates are properly aligned. Turn the knob to the desired flame level, then press and hold the ignition button until the burner lights. For precise control, adjust the knob to regulate the flame size. Always keep the burner caps in place during use to maintain even heat distribution. If the flame goes out, turn the knob to the “off” position and wait before relighting. Regular cleaning of the burner caps and grates is essential for optimal performance. Refer to the manual for detailed maintenance instructions to keep your burners functioning efficiently.

4.2 Operating the Oven

To operate the oven on your GE JGSP28 gas range, start by preheating it to the desired temperature using the control knob. Press the “Bake” button and adjust the temperature using the “+” or “-” buttons. Once preheated, place your dish on the oven racks, ensuring proper placement for even cooking. Use the timer function to set cooking duration and press “Start” to begin. For roasting or broiling, select the appropriate mode and follow the same temperature-setting process. Always use oven mitts to handle hot dishes, and avoid leaving the oven unattended during operation. Refer to the manual for specific guidelines on cooking modes and temperature adjustments to achieve optimal results. Regular cleaning of the oven interior is recommended to maintain performance and hygiene.

4.3 Timer and Clock Instructions

To use the timer on your GE JGSP28 gas range, press the Timer button and use the “+” or “-” buttons to set the desired duration. Once set, press Start to activate the timer. The timer will count down and emit a beep when the cooking time is complete. For the clock, press the Clock button and adjust the time using the same buttons. Ensure the clock is set correctly for accurate timer functionality. The timer and clock features are essential for managing your cooking schedule efficiently. Always refer to the manual for detailed instructions on advanced timing options and synchronization with other oven functions. Proper use of these features ensures precise cooking results and enhances your overall culinary experience.

Maintenance and Cleaning

Regular cleaning of the GE JGSP28 gas range is essential for optimal performance. Wipe down surfaces with a damp cloth and gentle cleansers to prevent residue buildup. Always clean burner caps and grates after use to ensure proper gas flow and ignition. For the oven, utilize the self-cleaning feature or manually clean with approved products. Avoid abrasive materials that may damage the finish. Check and replace worn-out parts promptly to maintain efficiency and safety. Refer to the manual for detailed instructions on deep cleaning and part maintenance.

5.1 Cleaning the Burners and Surface

To maintain the GE JGSP28 gas range’s performance, clean the burners and surface regularly. Turn off the range and let it cool completely before starting. Remove burner caps and grates, washing them in warm soapy water. Use a soft brush to scrub away food residue. For tough stains, soak parts in a mild detergent solution. Wipe the cooktop with a damp cloth, avoiding harsh chemicals. Dry thoroughly to prevent water spots. For the exterior, use a gentle cleanser and a soft sponge to maintain the finish. Regular cleaning prevents grease buildup and ensures proper burner function. Always refer to the manual for specific cleaning recommendations to avoid damaging the appliance.

5.2 Oven Cleaning and Maintenance

The GE JGSP28 gas range features a self-cleaning oven, making maintenance convenient. For self-cleaning, remove racks and set the oven to the self-clean cycle at 800–900°F. Let it run for 2–3 hours, then allow it to cool before wiping away ash with a damp cloth. Avoid using harsh chemicals during this process. For light cleaning, mix baking soda and water to create a paste, apply it, and wipe clean after heating the oven to 200°F for 30 minutes. Always wear gloves and ensure the oven is cool before cleaning. Regular maintenance prevents food residue buildup and maintains optimal performance. Follow the manual’s guidelines to ensure safe and effective cleaning without damaging the oven surfaces.

Troubleshooting Common Issues

The GE JGSP28 gas range may experience issues like ignition problems or error codes. Always refer to the manual for diagnosing and resolving these common issues effectively.

6.1 Diagnosing Common Problems

The GE JGSP28 gas range may encounter issues such as ignition failure, uneven heating, or error codes. Always start by checking the gas supply and ensuring the burner caps are clean. For ignition problems, inspect the igniter for wear or food debris. If the oven isn’t heating, verify the temperature settings and check for blocked vents. Refer to the manual for specific error code meanings, as they often indicate precise issues like faulty sensors or electrical connections. Before attempting repairs, ensure the range is cool and disconnect the power. For complex problems, contact GE customer support for professional assistance. Regular maintenance can prevent many of these issues.

6.2 Resetting the Range

Resetting the GE JGSP28 gas range can resolve minor issues without professional help. Start by turning off the power at the circuit breaker for at least 30 seconds. This resets the electronic controls. If the issue persists, check the oven igniter and ensure it’s clean. For error codes, press and hold the “Cancel/Off” button until the display clears. If the range still doesn’t function, consult the user manual for specific reset procedures. Always ensure the range is cool and the gas supply is turned off before attempting any troubleshooting. If problems continue, contact GE customer support for assistance. Regular resets can help maintain optimal performance.

Accessories and Optional Features

Enhance your cooking experience with compatible accessories like burner caps, griddle trays, and oven racks. Explore optional features such as a convection cooking kit or smart home integration.

7.1 Compatible Accessories

The GE JGSP28 gas range supports a variety of compatible accessories to enhance your cooking experience. These include burner caps for even flame distribution, griddle trays for versatile cooking surfaces, and additional oven racks for increased baking capacity. You can also opt for a convection cooking kit, which allows for faster and more evenly cooked meals. Other optional accessories may include stainless steel cleaner to maintain the range’s appearance and replacement igniter kits for long-term maintenance. These accessories are designed to work seamlessly with your gas range, ensuring optimal performance and durability. Always refer to the GE Appliances website for a complete list of recommended accessories.

7.2 Optional Upgrades

To enhance your cooking experience with the GE JGSP28 gas range, consider exploring optional upgrades. These include advanced features like smart home integration, allowing you to control your range remotely via smartphone apps. Another upgrade is the convection cooking kit, which optimizes baking and roasting by improving air circulation. Additionally, you can opt for premium cookware designed specifically for gas ranges, such as cast-iron griddles or stainless steel pans. Some users also choose to upgrade their range with additional storage solutions, such as a drawer for baking sheets or extra racks for the oven. These upgrades can be purchased separately and are designed to complement the range’s existing features. For more details, visit the GE Appliances website.

Warranty and Customer Support

The GE JGSP28 gas range is backed by a comprehensive warranty, including a one-year limited warranty on parts and labor. For assistance, contact GE Appliances at 800.GE.CARES or visit their official website.

8.1 Understanding Your Warranty

The GE JGSP28 gas range comes with a limited one-year warranty covering parts and labor. This warranty starts from the date of purchase and is non-transferable. It includes repairs or replacements for defective parts or workmanship under normal use. However, damages caused by misuse, improper installation, or external factors are excluded. To maintain warranty validity, ensure all installations and repairs are performed by authorized GE service technicians. For detailed terms and conditions, refer to the warranty section in the owner’s manual or visit the GE Appliances website. Registering your product online can also help streamline warranty claims and support services.

8.2 Contacting GE Support

For assistance with your GE JGSP28 gas range, contact GE Appliances support at 800.GE.CARES (800.432.2737). This service is available to address questions, repairs, or concerns. You can also visit their official website at www.GEAppliances.com for online support, including live chat, FAQs, and troubleshooting guides. Additionally, registered users can access exclusive resources and faster assistance. For warranty-related inquiries or technical support, ensure you have your model number and purchase details ready. GE Appliances also provides online manuals and installation guides, making it easier to resolve issues independently. Visit their website or refer to the owner’s manual for more information on reaching their customer support team.

Energy Efficiency and Eco-Friendliness

The GE JGSP28 gas range incorporates energy-saving features like efficient burners and an eco-friendly self-cleaning oven, reducing energy consumption while maintaining performance.

9.1 Energy-Saving Features

The GE JGSP28 gas range is designed with energy efficiency in mind. It features high-efficiency burners that provide consistent heat while minimizing gas consumption. The oven’s self-cleaning function uses less energy by focusing heat directly on food residue, reducing overall energy usage. Additionally, the range includes an energy-saving mode that optimizes burner performance during low-temperature cooking. These features not only lower energy bills but also contribute to a more eco-friendly cooking experience. By incorporating advanced engineering, the JGSP28 balances powerful performance with environmental responsibility, making it a sustainable choice for modern kitchens.

9.2 Eco-Friendly Practices

The GE JGSP28 gas range encourages eco-friendly cooking practices through efficient energy use and proper maintenance. Regular cleaning of burners and drip pans ensures optimal gas flow, reducing unnecessary energy consumption. The range’s self-cleaning oven feature helps maintain hygiene while minimizing the need for harsh chemicals. Users are advised to avoid excessive preheating and to use appropriately sized cookware to maximize heat efficiency. Additionally, the range’s design promotes even cooking, reducing the need for prolonged cooking times. By following these eco-conscious practices, users can enjoy a more sustainable cooking experience while maintaining high performance. These practices align with GE’s commitment to environmental responsibility.

Additional Features

The GE JGSP28 gas range includes advanced features like a self-cleaning oven and convection cooking capabilities, enhancing your culinary experience with versatility and efficiency. These features ensure even cooking and easy maintenance.

10.1 Self-Cleaning Oven Instructions

To use the self-cleaning oven on your GE JGSP28 gas range, start by removing racks and food debris. Set the oven to the self-cleaning mode, which heats it to high temperatures, turning food residue into ash; Ensure the room is well-ventilated and keep children away during the cycle. After the cycle completes, let the oven cool before wiping down surfaces with a damp cloth. Avoid using harsh chemicals, as they can damage the finish. Regular self-cleaning helps maintain oven efficiency and hygiene, ensuring optimal performance for your cooking needs. Always refer to the owner’s manual for specific instructions and safety precautions.

10.2 Convection Cooking Guide

The GE JGSP28 gas range features a convection cooking mode that ensures even heating and faster cooking times. To use this feature, preheat the oven to the desired temperature and select the convection setting. Place food on the middle rack for optimal air circulation. Reduce cooking temperature by 25°F and shorten cooking time by 30% compared to traditional baking. For best results, use bakeware with low sides to allow airflow. Avoid covering dishes, as this can trap moisture and reduce crispiness. Refer to the owner’s manual for specific temperature and time adjustments. Regularly clean the convection fan to maintain performance. This feature is ideal for roasting, baking, and achieving crispy results.

The GE JGSP28 gas range is an excellent choice for home cooks, offering efficiency, a sleek design, and versatile features. Always follow safety guidelines for optimal performance and longevity.

11.1 Summary of Key Points

The GE JGSP28 gas range is a versatile and efficient cooking appliance designed for modern kitchens. It features a 30-inch slide-in design with a self-cleaning oven, offering convenience and durability. The range includes burners for precise heat control and an oven for even cooking. Safety is prioritized with features like automatic ignition and heat-resistant glass. Proper installation and leveling are essential for optimal performance. Regular maintenance, such as cleaning burners and the oven, ensures longevity. The manual provides detailed instructions for troubleshooting common issues and resetting the range. With energy-saving features and eco-friendly practices, this range is both practical and environmentally conscious. Always refer to the manual for specific guidelines to ensure safe and efficient usage.

11.2 Encouragement for Safe Usage

To ensure a safe and enjoyable cooking experience with your GE JGSP28 gas range, always follow the guidelines outlined in this manual. Prioritize safety by keeping flammable materials away from the range and never leaving cooking unattended. Regularly inspect and maintain burners, igniters, and oven seals to prevent hazards. Use oven mitts or tongs to handle hot cookware, and keep children away from the range while it’s in operation. Proper ventilation is crucial to avoid gas fumes buildup. By adhering to these practices, you’ll not only prolong the lifespan of your appliance but also create a safer kitchen environment for everyone. Happy cooking!

ge advantium 120 user manual

GE Advantium 120 User Manual: A Comprehensive Guide

Welcome to your comprehensive resource for the GE Advantium 120! This guide provides access to manuals, instructions, and support for optimal oven operation and maintenance․

Overview of the GE Advantium 120

The GE Advantium 120 is a versatile appliance combining microwave, oven, and speed cooking technologies․ Designed for above-the-cooktop or built-in installations, it offers multiple cooking options in one unit․ It is known for its speedcook technology, which cooks food significantly faster than a conventional oven․

This oven is capable of precision cooking, convection baking, broiling, toasting, warming, proofing, and microwaving․ It offers features like preset food types and tested cooking tips for each function․ Models like SCA1001KSS and others offer user-friendly interfaces and comprehensive manuals for operation․ The Advantium 120 aims to simplify cooking with its innovative features and capabilities․

GE provides extensive support through owner’s manuals, installation instructions, and service scheduling․ This ensures users can effectively utilize and maintain their Advantium 120 for years to come․

Key Features and Technologies

The GE Advantium 120 boasts a range of innovative features․ Speedcook technology utilizes halogen lighting to cook food quickly․ Precision Cooking enables accurate temperature control for optimal results․ Convection baking ensures even heat distribution for perfectly baked goods․ Its microwave functionality provides standard microwave capabilities․

The oven also includes preset cooking options for various food types, simplifying the cooking process․ User-friendly interfaces and digital displays enhance usability․ Many models offer additional features like warming, proofing, and broiling․ The Advantium 120 is designed to be versatile, combining multiple cooking methods in a single appliance․

These technologies work together to provide efficient and high-quality cooking performance․ GE’s commitment to innovation is evident in the design and functionality of the Advantium 120․ This makes it a valuable addition to any modern kitchen․

Understanding the User Manual

This section guides you through accessing, downloading, and navigating the GE Advantium 120 user manual․ Learn how to effectively utilize the manual for comprehensive oven information․

Accessing and Downloading the Manual

Accessing your GE Advantium 120 user manual is simple․ Start by visiting the GE Appliances website and navigating to the “Support” section․ From there, locate the “Owner Center” and enter your specific model number, such as SCA1001KSS, to find relevant documentation․

You can directly download the owner’s manual, quickstart cooking manual, and technical service manual in PDF format․ These manuals provide detailed instructions on operation, maintenance, and troubleshooting; Ensure you have a PDF reader installed on your device to view the downloaded files․

Alternatively, explore online databases like manuals․plus for readily available manuals․ By following these steps, you’ll have quick access to the information you need to get the most out of your GE Advantium 120․

Navigating the Manual: Structure and Sections

The GE Advantium 120 user manual is structured to provide clear guidance on all aspects of the appliance․ Typically, the manual begins with an overview of features and safety precautions․ Subsequent sections cover operating instructions for various cooking modes, including microwave, oven/bake, and speedcook functions․

You’ll find detailed explanations of advanced features like precision cooking and convection baking․ A dedicated troubleshooting section addresses common issues and their solutions, while maintenance instructions guide you on proper cleaning and care․

The manual also includes installation guidelines and information on accessing customer support․ Use the table of contents or index to quickly locate specific topics․ Familiarizing yourself with the manual’s structure ensures efficient access to the information you need for optimal use and care of your Advantium 120․

Operating the Advantium 120

This section guides you through using your GE Advantium 120․ Discover its functions, from basic microwave operations to advanced cooking techniques for optimal results․

Basic Functions: Microwave, Oven/Bake, Speedcook

The GE Advantium 120 offers three primary cooking modes: Microwave, Oven/Bake, and Speedcook․ Mastering these functions unlocks the oven’s full potential․

Microwave: Utilize this mode for quick reheating, defrosting, and cooking tasks․ Select power levels and cooking times for precise results, referencing the user manual’s guidelines․

Oven/Bake: This functions like a traditional oven, perfect for baking, roasting, and warming․ Set the desired temperature and cooking time, ensuring even heat distribution for consistent outcomes․

Speedcook: The Advantium’s signature feature, Speedcook combines microwave energy with halogen heat for faster cooking times․ Refer to the cooking guide for preset food types, cooking tips, and tested brands, optimizing speed and quality․

Understanding these basic functions is crucial for effectively using your Advantium 120․

Advanced Features: Precision Cooking, Convection Baking

Beyond basic functions, the GE Advantium 120 boasts advanced capabilities like Precision Cooking and Convection Baking, elevating your culinary experience․

Precision Cooking: This feature utilizes advanced sensors and algorithms to automatically adjust cooking parameters, ensuring perfectly cooked results every time․ Explore the pre-programmed settings for various food types, eliminating guesswork and maximizing flavor․

Convection Baking: Activate convection baking for enhanced heat circulation, resulting in faster and more even baking․ This mode is ideal for pastries, cookies, and other baked goods, promoting consistent browning and texture throughout․

Mastering these advanced features unlocks the full potential of your Advantium 120, allowing you to achieve professional-quality results in your home kitchen․ Refer to the user manual for detailed instructions and recipe recommendations․

Troubleshooting and Maintenance

Ensure the longevity of your GE Advantium 120 with proper troubleshooting and maintenance․ Address common issues effectively and follow cleaning guidelines for optimal performance․

Common Issues and Solutions

Encountering issues with your GE Advantium 120? This section addresses common problems and provides practical solutions․ From error messages to heating inconsistencies, we cover a range of troubleshooting steps․

Problem: Oven not heating properly․

Solution: Check power supply, heating element, and temperature settings․ Consult the technical service manual for detailed diagnostics and repair instructions․

Problem: Microwave function not working․

Solution: Ensure the door is securely closed․ Verify the power level and cooking time settings․ Refer to the owner’s manual for specific troubleshooting tips․

Problem: Error codes displayed․

Solution: Consult the user manual for a list of error codes and their corresponding solutions․ Contact GE Appliances support if the issue persists․

Remember to always prioritize safety when troubleshooting electrical appliances․ Disconnect the power supply before attempting any repairs․

Cleaning and Care Instructions

Maintaining your GE Advantium 120 ensures optimal performance and longevity․ This section outlines proper cleaning and care procedures to keep your oven in top condition․ Regular cleaning prevents buildup and ensures efficient operation․

Oven Cavity: Clean regularly to prevent food buildup․ Use a mild detergent and a soft cloth․ For stubborn stains, refer to the owner’s manual for recommended cleaning solutions;

Microwave Components: Wipe down the interior and turntable after each use to prevent splatters from hardening․ Use a damp cloth and mild soap․

Exterior Surfaces: Clean the exterior with a soft cloth and mild cleaner․ Avoid abrasive cleaners that can scratch the surface․

Ventilation: Ensure proper ventilation to prevent overheating․ Clean vents regularly to remove dust and debris․

Always disconnect the power supply before cleaning․ Refer to the user manual for detailed cleaning instructions and safety precautions․

Installation and Support

This section provides an overview of the Advantium 120 installation process․ It also offers guidance on accessing support resources for any questions or assistance needed․

Installation Guide Overview

Proper installation is crucial for the safe and effective operation of your GE Advantium 120 oven․ This overview highlights key steps and considerations from the complete installation guide․ Always consult the full manual for detailed instructions specific to your model, such as SCA1001KSS․ Ensure you have the necessary tools and understand electrical requirements, including the 120V, 60 Hz, 15 amp circuit needed․

Pay close attention to grounding wires and proper connections․ If removed for service, restore them to their original positions․ This guide will walk you through mounting and connecting your Advantium 120, whether it’s a single unit or part of a combination․ For built-in models, refer to specific instructions for Advantium 120V speedcook and convection oven installations․ Remember to follow all safety precautions during installation․

Accessing Support and Service

Need assistance with your GE Advantium 120? Accessing support and service is easy․ Start by exploring the GE Appliances website for FAQs, troubleshooting tips, and user manuals․ You can download owner’s manuals and quickstart guides for your specific model, such as the SCA1001KSS, providing detailed information on operation and maintenance․

For personalized support, contact GE Appliances customer service at 1-800-626-2005․ Online scheduling for service appointments is also available for convenience․ When contacting support, have your model and serial number ready․ Explore resources on GEAppliances․com for ordering parts and scheduling repairs․ Whether you need help understanding features, resolving issues, or require professional service, GE is committed to providing comprehensive support for your Advantium 120 oven․

bosch silence plus 46 dba manual

The Bosch Silence Plus 46 DBA manual is a comprehensive guide providing information on installation and operation of the dishwasher with ease and efficiency always online.

Overview of the Product

The Bosch Silence Plus 46 DBA is a high-quality dishwasher designed to provide efficient and quiet cleaning. It features advanced technology and a range of cycles to suit different needs. With its sleek design and user-friendly interface, this dishwasher is a great addition to any kitchen. The product is designed to be energy efficient and environmentally friendly, making it a popular choice among consumers. The Bosch Silence Plus 46 DBA has a large capacity and can hold a significant amount of dishes, making it ideal for large families or households. The dishwasher also features a range of safety features, including child lock and anti-flood protection. Overall, the Bosch Silence Plus 46 DBA is a reliable and efficient dishwasher that is designed to make cleaning easier and more convenient. It is a great investment for anyone looking for a high-quality dishwasher.

Availability of Bosch Manuals

Bosch manuals are available online for free, with 3398 manuals currently available for various products, including dishwashers and other appliances always online easily.

Online Resources

There are several online resources available for the Bosch Silence Plus 46 DBA manual, including websites that offer free downloads of user manuals and instructional guides. These resources can be accessed through a simple search on the internet, using keywords such as “Bosch Silence Plus 46 DBA manual” or “Bosch dishwasher user manual”. Many websites, such as Manuals.ca, offer a wide range of Bosch manuals, including the Silence Plus 46 DBA model. Additionally, some websites provide video tutorials and FAQs to help users troubleshoot and maintain their dishwashers. Overall, the internet provides a wealth of information and resources for users of the Bosch Silence Plus 46 DBA dishwasher, making it easy to find the help and guidance they need to operate and maintain their appliance effectively and efficiently. The online resources are easily accessible and convenient to use.

Features of the Bosch Silence Plus 46 DBA

The Bosch Silence Plus 46 DBA has quiet operation and sanitizing options for cleaning dishes efficiently always online with ease and convenience every time using the appliance.

Quiet Operation

The Bosch Silence Plus 46 DBA manual highlights the quiet operation feature of the dishwasher, which is a major advantage for users who value a peaceful environment. This feature is made possible by the advanced technology used in the design and construction of the appliance. The quiet operation is also a result of the efficient insulation and sound-absorbing materials used in the dishwasher. According to the manual, the noise level of the Bosch Silence Plus 46 DBA is significantly lower than other dishwashers in its class, making it an ideal choice for households that prioritize quietness. The manual provides detailed information on how to maintain the quiet operation feature and troubleshoot any issues that may arise. By following the guidelines outlined in the manual, users can ensure that their Bosch Silence Plus 46 DBA continues to operate quietly and efficiently. The manual is available online for easy access.

Operating the Bosch Silence Plus 46 DBA

Operating the Bosch Silence Plus 46 DBA requires following the manual’s guidelines for optimal performance always using online resources available.

User Manual Guidance

The user manual for the Bosch Silence Plus 46 DBA provides detailed guidance on how to operate and maintain the dishwasher, including information on loading dishes, selecting cycles, and troubleshooting common issues. The manual is designed to be easy to follow, with clear instructions and illustrations to help users understand how to get the most out of their appliance. By following the guidance in the manual, users can ensure that their dishwasher is working efficiently and effectively, and that they are getting the best possible results from their appliance. The manual also provides information on safety precautions and maintenance tasks, such as cleaning the filter and checking for blockages, to help users keep their dishwasher in good working order. Overall, the user manual is an essential resource for anyone who owns a Bosch Silence Plus 46 DBA dishwasher.

Troubleshooting and Maintenance

Regular maintenance and troubleshooting help extend the life of Bosch Silence Plus 46 DBA dishwasher with proper care and attention always online easily.

Common Issues and Solutions

The Bosch Silence Plus 46 DBA manual provides solutions to common issues that may arise during operation, including error codes and troubleshooting guides to help resolve problems quickly and efficiently.
The manual outlines steps to take in case of issues such as poor washing performance, leaks, or strange noises, helping users to identify and fix problems themselves.
Additionally, the manual provides information on how to perform routine maintenance tasks, such as cleaning the filter and checking the drain hose, to prevent issues from occurring in the first place.
By following the guidance provided in the manual, users can help to ensure their Bosch Silence Plus 46 DBA dishwasher continues to run smoothly and efficiently, and that any issues that do arise are resolved quickly and easily.
The manual is a valuable resource for anyone who owns a Bosch Silence Plus 46 DBA dishwasher, providing peace of mind!

Additional Resources

Online support and videos are available for the Bosch Silence Plus 46 DBA manual to help with installation and operation always online easily.

Online Support and Videos

For the Bosch Silence Plus 46 DBA manual, online support and videos are readily available to assist with any queries or issues that may arise during installation or operation. These resources can be accessed through the official website of Bosch, where users can find a comprehensive library of videos, tutorials, and FAQs. The online support team is also available to provide guidance and troubleshooting tips to ensure that users can get the most out of their dishwasher. Additionally, videos can be found on various online platforms, showcasing the features and benefits of the Bosch Silence Plus 46 DBA, as well as providing step-by-step instructions for maintenance and repair. By utilizing these online resources, users can optimize their dishwasher’s performance and extend its lifespan, making it a valuable investment for any household. Online support is always available and easily accessible.

Open post

dirt devil endura max manual

Dirt Devil Endura Max Manual⁚ A Comprehensive Guide

This guide provides a detailed overview of the Dirt Devil Endura Max, a vacuum cleaner designed for efficient household cleaning․ It covers various aspects, including its powerful motor, advanced filtration, and user-friendly design, ensuring optimal performance for diverse cleaning tasks․

Overview of the Dirt Devil Endura Max

The Dirt Devil Endura Max is a versatile vacuum cleaner designed for comprehensive home cleaning․ It features a powerful motor that delivers consistent suction, ensuring effective dirt and debris removal from various surfaces․ This model incorporates an advanced filtration system, capturing dust and allergens, thus promoting improved air quality․ The Endura Max includes a large capacity dirt cup, allowing for extended cleaning sessions without frequent emptying․ Its lightweight design enhances maneuverability, making it easy to navigate around furniture and different rooms․ This vacuum also comes equipped with a quick-release wand, enabling users to reach tight spaces and above-floor areas effortlessly․ The combination of power, advanced filtration, and user-friendly features makes the Dirt Devil Endura Max an ideal choice for everyday cleaning needs․ It efficiently handles both carpeted and hard floor surfaces, providing consistent cleaning performance throughout the home․ The included accessories further enhance its versatility, catering to various cleaning tasks․ The Endura Max also boasts a no-loss suction feature for a worry-free cleaning experience․

Key Features and Specifications

The Dirt Devil Endura Max boasts several key features that enhance its cleaning performance and usability․ Its powerful motor ensures consistent suction for effective dirt removal on diverse floor types․ The advanced Endura filtration system captures dust and allergens, contributing to improved air quality during cleaning․ This model includes a large dirt cup, reducing the frequency of emptying and allowing for extended cleaning sessions․ The quick-release wand provides an additional 10 feet of reach, making it easier to clean high and hard-to-reach areas․ The lightweight design, around 4kg, enhances maneuverability and reduces user fatigue․ It also features a no-loss suction technology, ensuring consistent performance․ The inclusion of various accessories, such as the turbo tool for pet hair, crevice tool, dusting brush, and extension wand, further enhances its versatility for different cleaning tasks․ Additionally, the vacuum is designed with a user-friendly interface, making it easy to operate and maintain․ It is suitable for both carpeted and hard floor surfaces, making it a versatile cleaning solution for any home․ The vacuum also has an odor-trapping feature, making it ideal for pet owners․

Assembly Instructions

Assembling the Dirt Devil Endura Max is a straightforward process designed for user convenience․ Begin by carefully unpacking all components from the box․ First, connect the handle to the main body of the vacuum cleaner, ensuring it clicks securely into place․ Next, attach the hose to the designated port on the main unit, making sure it is firmly connected․ Depending on your cleaning needs, select the appropriate accessory, such as the crevice tool, dusting brush, or turbo tool, and attach it to the extension wand or directly to the hose․ These attachments should click or slide into place easily․ For optimal performance, ensure all connections are properly secured before use․ It is essential to double-check that all parts are correctly aligned and fitted to avoid any operational issues․ Refer to the included quick start guide for visual aids if needed․ The vacuum should be fully assembled before its first use, and avoid forcing any components during assembly․ If issues arise, consult the full user manual for troubleshooting guidance, ensuring a smooth and effective setup of the Dirt Devil Endura Max․

Operating Instructions

To begin using the Dirt Devil Endura Max, first ensure the vacuum is fully assembled and the power cord is securely plugged into a grounded outlet․ Adjust the height setting according to your flooring type using the height adjustment knob; this is crucial for optimal cleaning performance on different surfaces․ Turn on the power switch, usually located on the main body, to start the vacuum․ For general floor cleaning, use the main floor head․ For hard-to-reach areas or upholstery, attach the quick-release wand along with the desired accessory․ The wand extends your reach and makes cleaning above-floor areas easier․ When using the turbo tool, be sure to move the brush in a back-and-forth motion to effectively remove pet hair and debris from carpets and upholstery․ Always hold the vacuum by the handle and guide it gently across the surface․ Avoid forcing the vacuum or dragging it across rough surfaces․ When finished, turn off the power switch, and unplug the vacuum․ Regularly empty the dust cup to maintain suction power and cleaning efficiency․ Following these steps ensures effective and safe operation of the Dirt Devil Endura Max․

Maintenance and Cleaning

Maintaining your Dirt Devil Endura Max is crucial for optimal performance and longevity․ Regularly empty the dust cup after each use to prevent clogs and maintain suction power․ To clean the dust cup, remove it from the vacuum body and empty the contents into a trash bin․ The dust cup can be washed with warm soapy water, but ensure it is completely dry before reassembling it․ Periodically check the filter; a clean filter is essential for maintaining suction; Rinse the filter with water and allow it to air dry completely․ Avoid using the vacuum with a damp filter to prevent damage․ Inspect the brush roll for any tangled hair or debris, and remove it to clean․ Use scissors to carefully cut away any trapped hair․ Also, check for clogs in the hose and wand, as these can reduce suction․ If you find a clog, use a long object to carefully remove it․ Wipe down the exterior of the vacuum with a damp cloth to remove any dust or dirt․ Proper maintenance will ensure that your Dirt Devil Endura Max continues to perform efficiently;

Troubleshooting Common Issues

Encountering issues with your Dirt Devil Endura Max is sometimes inevitable, but most problems can be resolved with simple troubleshooting․ If you notice a loss of suction, first check if the dust cup is full and needs emptying․ A full dust cup can significantly reduce suction․ Next, inspect the filter; a clogged filter is a common cause of reduced suction․ Ensure the filter is clean and completely dry before reinstalling․ Also, verify that the hose and wand are free from blockages․ A clogged hose or wand will impede airflow and reduce suction power․ If the brush roll stops spinning, check for tangled hair or debris that may be causing it to jam․ Remove the brush roll and clean it thoroughly․ If the vacuum cleaner will not turn on, ensure that it is properly plugged into a working outlet․ Check the power cord for any damage, and if damaged, do not use the appliance․ If the issue persists after checking these points, consult the user manual for more detailed troubleshooting steps․ Remember safety first and unplug your vacuum before performing any maintenance checks․

Filter Maintenance

Maintaining your Dirt Devil Endura Max’s filters is crucial for optimal performance and longevity․ Regular filter cleaning ensures consistent suction power and helps to maintain the air quality in your home․ The Endura Max typically features a rinsable filter, which should be cleaned regularly․ To clean the filter, first, turn off and unplug the vacuum cleaner․ Remove the filter from its housing, usually located within the dust cup or behind it․ Gently tap the filter to remove loose debris․ Rinse the filter under lukewarm running water, ensuring to remove all dirt and dust․ Avoid using soap or other cleaning agents․ Allow the filter to air dry completely before placing it back into the vacuum․ Never operate the vacuum with a wet or damp filter, as this can damage the motor․ Depending on your usage, you may need to replace the filter periodically․ Check the manufacturer’s guidelines for recommended replacement intervals․ Proper filter maintenance is an essential part of keeping your vacuum performing at its best and is vital for effective cleaning․

Accessory Usage

The Dirt Devil Endura Max comes with a range of accessories designed to enhance its cleaning capabilities across various surfaces and areas․ The quick-release wand is perfect for extending your reach, allowing you to clean high areas and tight spaces with ease․ The crevice tool is ideal for accessing narrow gaps, corners, and edges, ensuring a thorough clean in hard-to-reach areas․ A dusting brush is included for gentle cleaning of delicate surfaces like furniture, shelves, and blinds, preventing scratches and damage․ The turbo tool, often designed specifically for pet hair, is excellent for upholstery, stairs, and carpets, effectively removing stubborn pet hair and debris․ To use an accessory, attach it to the end of the wand or directly to the vacuum’s hose․ Ensure a secure fit before starting the vacuum․ Each accessory serves a specific purpose, maximizing the vacuum’s cleaning potential․ Experiment with the different tools to discover the best approach for various cleaning tasks․ Refer to the user manual for detailed instructions on proper attachment and usage of each accessory․ Proper use of accessories is vital for efficient and effective cleaning․

Available Manual Languages

The Dirt Devil Endura Max manual is primarily available in English, ensuring clear and accessible instructions for a wide range of users․ This comprehensive manual provides detailed guidance on assembly, operation, maintenance, and troubleshooting of the vacuum cleaner․ While the primary language is English, users may find additional language options depending on their region and the specific retailer from whom the product was purchased․ Some retailers and online platforms may offer the manual in other languages, such as French or Spanish․ These translated versions can cater to a more diverse user base and ensure that language barriers do not prevent customers from using the product effectively․ To find a manual in a specific language, it is recommended to check the manufacturer’s website or the website of the retailer where the vacuum was purchased․ Look for download options or links to PDF files․ If you can’t find the manual in your preferred language, online translation tools may help to make the English version more accessible․ Always refer to the original manufacturer’s manual for the most accurate and reliable information․

Posts navigation

1 2 3
Scroll to top