Manual transmissions, while known for reliability, aren’t immune to problems; understanding potential failures is crucial for vehicle longevity and safe operation.
These systems rely on precise mechanical interaction, making them susceptible to wear and tear over time, leading to various operational difficulties.
Common issues range from fluid leaks and slipping clutches to internal damage, impacting shifting smoothness and overall performance, requiring prompt attention.
Overview of Manual Transmissions
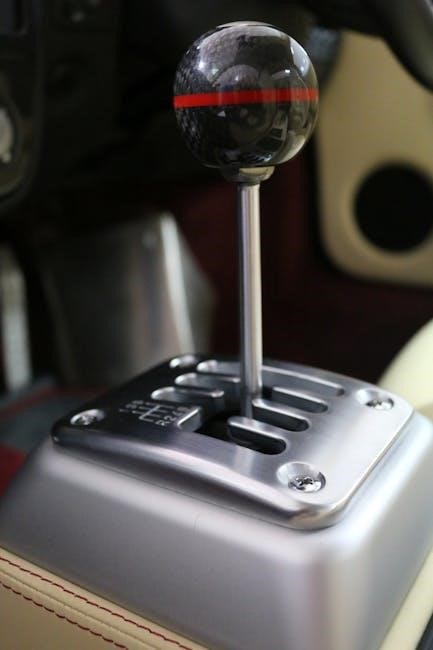
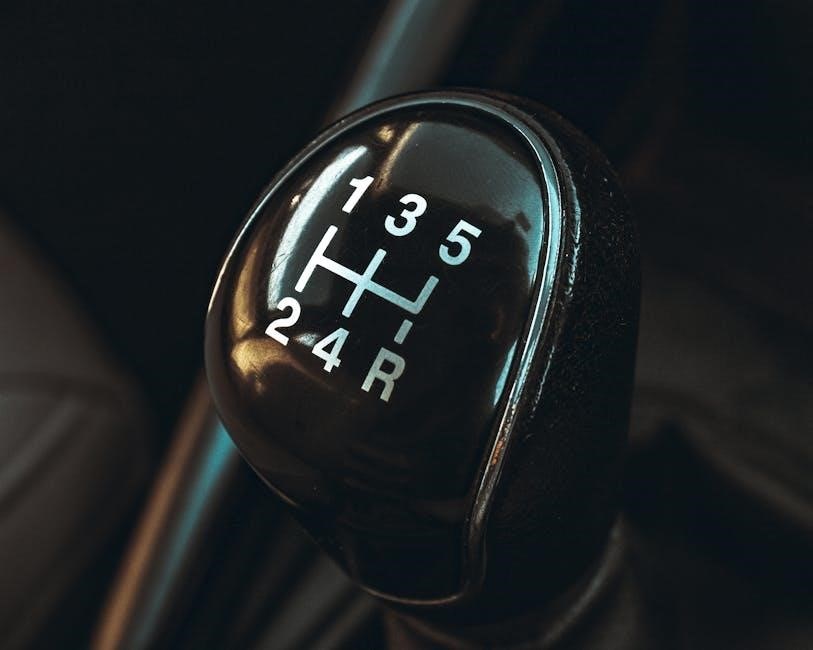
Manual transmissions represent a traditional method of transferring engine power to the wheels, relying on a driver-operated clutch and a series of gears to control speed and torque. Unlike automatic transmissions, they offer direct mechanical engagement, providing drivers with greater control and often, improved fuel efficiency. The core components include the gearbox housing, gears of varying sizes, shafts, synchronizers, bearings, and the clutch assembly.
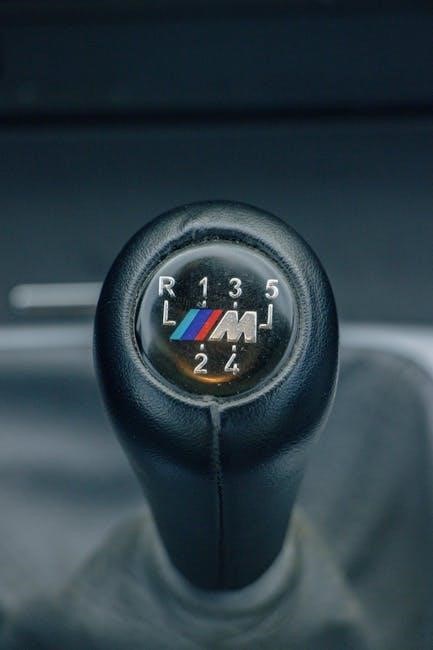
The process begins with the engine’s rotational force entering the transmission. The driver selects the appropriate gear using the shift lever, which engages specific gear sets within the transmission. Synchronizers play a vital role in smoothly matching the speeds of the gears before engagement, preventing grinding. The clutch disengages the engine from the transmission during gear changes, allowing for seamless shifts.
Historically favored for their simplicity and durability, manual transmissions are still prevalent in many vehicles, particularly those prioritizing driver engagement and performance. However, their complexity means they are susceptible to wear and tear, requiring regular maintenance and occasional repairs to ensure optimal functionality.
Why Manual Transmissions Fail
Manual transmission failures stem from a variety of factors, primarily related to wear and tear from consistent mechanical stress. Frequent and forceful shifting, coupled with a lack of proper maintenance, accelerates component degradation. Worn synchronizers, crucial for smooth gear changes, often fail due to constant friction, leading to grinding noises and difficulty shifting.
Shift linkage wear is another common culprit, causing imprecise gear selection and potentially allowing the transmission to pop out of gear. Internal damage to gears themselves can occur from improper lubrication or impacts. Furthermore, bearing failures, often caused by contamination or age, introduce noise and vibration.
Neglecting regular fluid checks and changes contributes significantly to transmission problems, as degraded fluid loses its lubricating properties. High-pressure systems continuously operating can compromise seals, though less common in manuals than automatics. Ultimately, a combination of these factors leads to diminished performance and eventual failure.
Common Symptoms of Manual Transmission Problems
Recognizing issues early is key; symptoms include difficulty shifting, grinding gears, clutch slippage, unusual noises (buzzing, clicking, clunking, humming), and, rarely, fluid leaks.
Difficulty Shifting Gears
Experiencing trouble getting your manual transmission into gear is a common indicator of underlying problems. This can manifest in several ways, from a general stiffness when attempting to shift, to an inability to select certain gears altogether. Often, this difficulty is more pronounced when the engine is cold, but it can persist even after the vehicle has warmed up.
A primary cause is often worn synchronizers, components crucial for matching the speed of the gears during shifts. When these wear, they struggle to smoothly engage, resulting in resistance. However, shift linkage wear can also contribute, creating slack in the system and making precise gear selection challenging. In more severe cases, internal damage to the gears themselves could be the culprit, requiring a more extensive repair. Ignoring this symptom can lead to further damage and potentially complete transmission failure.
Grinding Gears
Hearing a grinding noise when attempting to shift gears is a particularly concerning symptom of manual transmission issues. This harsh sound indicates that the gears aren’t smoothly engaging, and are instead colliding with each other. This is often a direct result of worn synchronizers, which are responsible for matching gear speeds before engagement. When synchronizers are failing, they can’t properly synchronize, leading to that unmistakable grinding sound.
However, grinding can also stem from improper driving technique – rushing shifts without fully depressing the clutch. While occasional grinding might not cause immediate damage, consistent grinding accelerates wear on the gears themselves. Ignoring this issue can lead to significant internal damage, potentially requiring a complete transmission rebuild or replacement. Prompt diagnosis and repair are crucial to prevent further, more costly problems.
Clutch Slippage
Clutch slippage is a frequent indicator of manual transmission problems, particularly noticeable during acceleration. It manifests as the engine revving higher than expected without a corresponding increase in vehicle speed. This occurs when the clutch disc isn’t fully engaging with the flywheel, causing it to slip instead of transferring power efficiently. Several factors can contribute to this, including a worn clutch disc, contaminated clutch surfaces (from oil or grease), or issues with the clutch hydraulics.
Unlike automatic transmissions, manual systems rely heavily on the clutch for power transfer. Prolonged slippage generates excessive heat, accelerating wear on the clutch components. If left unaddressed, it can lead to complete clutch failure, leaving you stranded. It’s important to differentiate clutch slippage from other issues, but it’s a clear sign that attention is needed.
Transmission Fluid Leaks
Transmission fluid leaks, while less common in manual transmissions compared to automatics, are still a significant concern when they occur. Manual transmissions utilize fluid – typically gear oil – to lubricate internal components and ensure smooth operation. Leaks can stem from compromised seals, damaged gaskets, or even cracks in the transmission casing itself. Identifying the source and type of fluid is crucial for proper diagnosis.
Because manual transmissions operate with high pressure, even a small leak can escalate quickly. Reduced fluid levels lead to increased friction and wear, potentially causing significant internal damage. Regularly inspecting for fluid puddles under the vehicle, and checking the fluid level (if applicable), can help catch leaks early. Addressing leaks promptly prevents costly repairs and maintains transmission health.
Unusual Noises During Operation
Unusual noises emanating from the transmission are often early indicators of underlying mechanical issues within a manual system. These sounds can manifest in various forms, each potentially signaling a different problem. Buzzing sounds might suggest issues with bearings or gear meshing, while clicking sounds could indicate worn synchronizers struggling to engage gears smoothly.
More concerning are clunking sounds, which often point to significant internal damage or loose components. Humming or roaring sounds can indicate bearing failures or low fluid levels increasing friction. Remember, you know your vehicle best; any new or changing sound warrants investigation. Ignoring these auditory cues can lead to more extensive and expensive repairs down the line, potentially resulting in complete transmission failure.
Buzzing Sounds
Buzzing sounds originating from the manual transmission often suggest a problem within the gear train or associated components. These vibrations can stem from worn or damaged bearings, creating a resonant frequency as the transmission operates. Improper gear meshing, potentially due to worn teeth or misalignment, can also generate a buzzing noise. It’s crucial to differentiate this sound from engine-related buzzing, which typically has a different pitch and source.
A mechanic’s inspection is vital to pinpoint the exact cause, as ignoring a buzzing sound can lead to further damage. The sound may become more pronounced during specific gear engagements or under load. Early diagnosis and repair can prevent more significant, costly issues from developing within the transmission system, ensuring continued smooth operation.
Clicking Sounds
Clicking sounds emanating from a manual transmission frequently indicate issues within the synchronizers or shift linkage. Synchronizers, responsible for matching gear speeds, can click when worn, especially during gear changes. This clicking often occurs when attempting to shift into a specific gear, signaling a need for inspection and potential replacement. A failing shift linkage, connecting the gear lever to the transmission, can also produce clicking as components loosen or wear.
Because “nobody knows the sounds of your car better than you,” any new clicking should be investigated promptly. Ignoring these sounds can lead to difficulty shifting or even gears popping out of engagement. A professional diagnosis is essential to determine the source and prevent further damage to the transmission system, ensuring safe and reliable operation.
Clunking Sounds
Clunking sounds originating from the manual transmission are often a sign of more serious internal mechanical problems. These noises typically suggest loose or damaged gears, worn bearings, or issues within the differential. The sound is often most noticeable during gear changes, acceleration, or deceleration, indicating a significant impact between components. Ignoring clunking sounds can lead to catastrophic failure of the transmission, resulting in costly repairs or complete replacement.
As stated, if you “suddenly start to hear something you weren’t hearing before,” it’s crucial to seek professional attention. A mechanic can accurately diagnose the source of the clunking and recommend appropriate repairs. Prompt intervention can prevent further damage and ensure the continued safe operation of your vehicle, avoiding potentially dangerous situations.
Humming or Roaring Sounds
Humming or roaring sounds emanating from the manual transmission often indicate bearing failures or issues with the gears themselves. These noises typically increase with vehicle speed, suggesting a problem within the rotating components of the transmission. A consistent humming can point to worn wheel bearings, while a more pronounced roaring sound often signifies damaged gears or a failing differential. These sounds are a clear indication that internal parts are experiencing excessive friction and wear.
According to available information, if you experience “a buzzing, clicking, clunking, humming, or roaring” sound, your transmission may be attempting to communicate a problem. Ignoring these sounds can lead to further damage and eventual transmission failure, necessitating expensive repairs. A professional inspection is vital for accurate diagnosis and timely intervention.

Specific Mechanical Issues
Mechanical failures within a manual transmission often involve worn synchronizers, shift linkage wear, or internal gear damage, impacting smooth operation and requiring repair.
Worn Synchronizers
Synchronizers are critical components within a manual transmission, responsible for matching the speeds of the gears before engagement, ensuring smooth and quiet shifting. Over time, these synchronizers experience wear due to the constant friction during gear changes. This wear manifests as difficulty shifting, particularly into specific gears, and the infamous grinding noise when attempting to change gears.
As synchronizers degrade, the speed matching process becomes less effective, leading to increased stress on the gears themselves. A worn synchronizer doesn’t eliminate the speed difference entirely, causing the gears to clash. European Auto Shop highlights that a worn synchronizer is a frequent cause of shifting problems. Identifying and replacing worn synchronizers is essential to restore smooth operation and prevent further damage to the transmission. Ignoring this issue can lead to more extensive and costly repairs down the line.
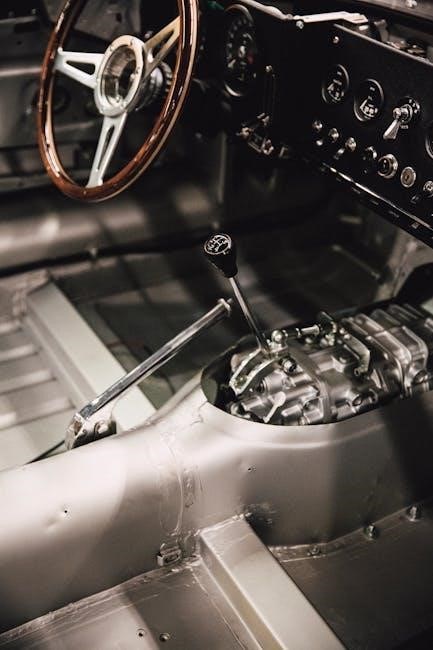
Shift Linkage Wear
Shift linkage connects the gear shifter in the cabin to the transmission itself, translating driver input into gear changes. This system, comprised of rods, cables, or levers, is susceptible to wear and looseness over time, particularly in older vehicles. Quora and Autoscope both emphasize shift linkage wear as a common issue, often resulting in sloppy gear engagement or the sensation of gears popping out of place.
As the linkage components wear, play develops, reducing the precision of gear selection. This can manifest as difficulty finding the desired gear, a vague or imprecise shifter feel, and even the inability to fully engage a gear. Firmly moving the shifter might temporarily resolve the issue, but this is a symptom, not a solution. Addressing shift linkage wear involves inspecting the components for damage or excessive play and replacing worn parts to restore accurate and reliable gear changes.
Internal Damage to Gears
Internal gear damage within a manual transmission represents a serious issue, often stemming from prolonged neglect, aggressive driving, or insufficient lubrication. While not explicitly detailed in the provided sources, the general understanding of manual transmission failure points to this as a potential cause of significant operational problems. Damage can range from chipped or worn teeth to complete gear failure, severely impacting the transmission’s ability to function correctly.
Such damage typically manifests as loud, grinding noises during gear changes, difficulty selecting gears, or a complete inability to shift. The resulting metal debris can further contaminate the transmission fluid, accelerating wear on other components. Repairing internal gear damage usually necessitates a complete transmission rebuild or replacement, a costly undertaking. Preventative maintenance, including regular fluid changes and proper shifting techniques, is crucial to mitigate the risk of internal gear failure.
Bearing Failures
Bearing failures within a manual transmission, though not directly highlighted in the provided snippets, are a common consequence of wear and tear, and contribute significantly to unusual noises. These bearings support the rotating shafts and gears, and when they degrade, they introduce play and friction into the system. This leads to a cascade of potential problems, impacting shifting smoothness and overall transmission efficiency.
Symptoms of bearing failure often include humming, roaring, or even clicking sounds emanating from the transmission, particularly during operation. As the bearings worsen, these noises become more pronounced. Ignoring bearing failures can lead to further damage to gears and shafts, ultimately necessitating a complete transmission overhaul. Regular fluid checks and addressing any unusual noises promptly are vital preventative measures to extend the lifespan of these critical components and avoid costly repairs.
Diagnosis and Repair
Accurate diagnosis, often requiring a professional inspection, is key to resolving manual transmission issues; identifying noise sources is paramount for effective repair strategies.
Professional Inspection
A comprehensive professional inspection is the cornerstone of accurately diagnosing manual transmission problems. Experienced mechanics possess the expertise to identify subtle issues often missed by the untrained eye. This involves a thorough external examination, checking for fluid leaks – though less common in manuals than automatics – and assessing the condition of the shift linkage.
Crucially, a skilled technician will perform a road test, carefully listening for unusual noises like buzzing, clicking, clunking, humming, or roaring, as these sounds can pinpoint internal damage or worn components. They’ll evaluate gear engagement quality, noting any difficulty shifting or instances of grinding. Internal inspection may necessitate transmission removal to assess synchronizer wear, gear damage, and bearing failures. Proper diagnosis avoids unnecessary repairs and ensures a lasting solution, saving both time and money.
Fluid Level Checks
While manual transmissions don’t rely on fluid to the same extent as automatics, checking the fluid level remains a vital preventative measure. Low fluid can contribute to synchronizer wear and difficulty shifting, though significant leaks are less frequent in manual systems. Locate the fill plug, typically on the side of the transmission, and carefully remove it.
The fluid level should be at the specified mark, often near the fill plug opening. If low, top it off with the manufacturer-recommended gear oil. Inspect the fluid’s condition; it should be clean and free of metallic particles, indicating internal wear. Dark or contaminated fluid suggests a need for a complete fluid change. Remember, regular fluid checks, alongside changes, help maintain optimal lubrication and protect internal components, extending the transmission’s lifespan and ensuring smooth operation.
Identifying the Source of Noises
Unusual sounds emanating from the transmission are often early indicators of underlying problems. A buzzing sound could signal issues within the transmission itself, while clicking noises might point to worn or damaged components. Clunking sounds frequently suggest problems with the shift linkage or internal gear engagement.
Humming or roaring sounds, especially noticeable during acceleration, can indicate bearing failures or gear damage. Carefully listen to when the noise occurs – during shifting, acceleration, deceleration, or neutral – to narrow down the potential source. Remember, you know your car’s normal sounds best; any sudden changes warrant investigation. A professional mechanic can accurately pinpoint the noise’s origin and recommend appropriate repairs, preventing further damage and ensuring safe operation.
Preventative Maintenance
Regular fluid changes, proper shifting techniques, and promptly addressing any emerging issues are vital for extending the life of your manual transmission system.
Regular Fluid Changes
Maintaining the correct fluid level and ensuring it remains clean is paramount for a healthy manual transmission. Unlike automatic transmissions, manual transmissions don’t typically experience large-scale fluid leaks as frequently, but fluid degradation and contamination still occur over time.
Regular fluid changes – following the manufacturer’s recommended intervals – lubricate moving parts, reducing friction and wear. This preventative measure minimizes the risk of synchronizer wear and internal damage to gears.
Old, contaminated fluid loses its lubricating properties, accelerating component failure. Checking the fluid level periodically is also essential; low fluid levels can lead to grinding gears and difficulty shifting. Using the correct type of transmission fluid, as specified in your vehicle’s owner’s manual, is absolutely critical for optimal performance and longevity.
Proper Shifting Techniques
Employing correct shifting practices significantly extends the life of a manual transmission and prevents premature wear. Avoid “speed shifting” or forcing the gear lever, as this puts undue stress on synchronizers and shift linkage components.
Fully depress the clutch pedal before each gear change, ensuring complete disengagement of the engine from the transmission. Smooth, deliberate movements are key; rushing shifts can cause grinding and damage to the gears.
Downshifting should be performed with a rev-matching technique to synchronize engine speed with the lower gear, reducing stress on the transmission. Recognizing when to shift based on engine RPM and vehicle speed also contributes to longevity. Sloppy or imprecise shifting can accelerate shift linkage wear, potentially leading to gears popping out.
Addressing Issues Promptly
Ignoring early signs of manual transmission trouble can escalate minor problems into costly repairs. Unusual noises – buzzing, clicking, clunking, humming, or roaring – should never be dismissed; they often indicate internal wear or damage.
Difficulty shifting gears or experiencing grinding during changes demands immediate attention, potentially signaling worn synchronizers or linkage issues. Any noticeable clutch slippage requires prompt diagnosis, as it could stem from wear or fluid contamination.
Even seemingly minor issues, like a slight change in shifting feel, warrant investigation by a qualified mechanic. Delaying repairs can lead to more extensive internal damage, potentially requiring a complete transmission overhaul or replacement, significantly increasing repair costs.